Last updated on February 24th, 2026 at 09:25 am
Before adding running rigging to your ships you should complete the standing rigging tutorial.
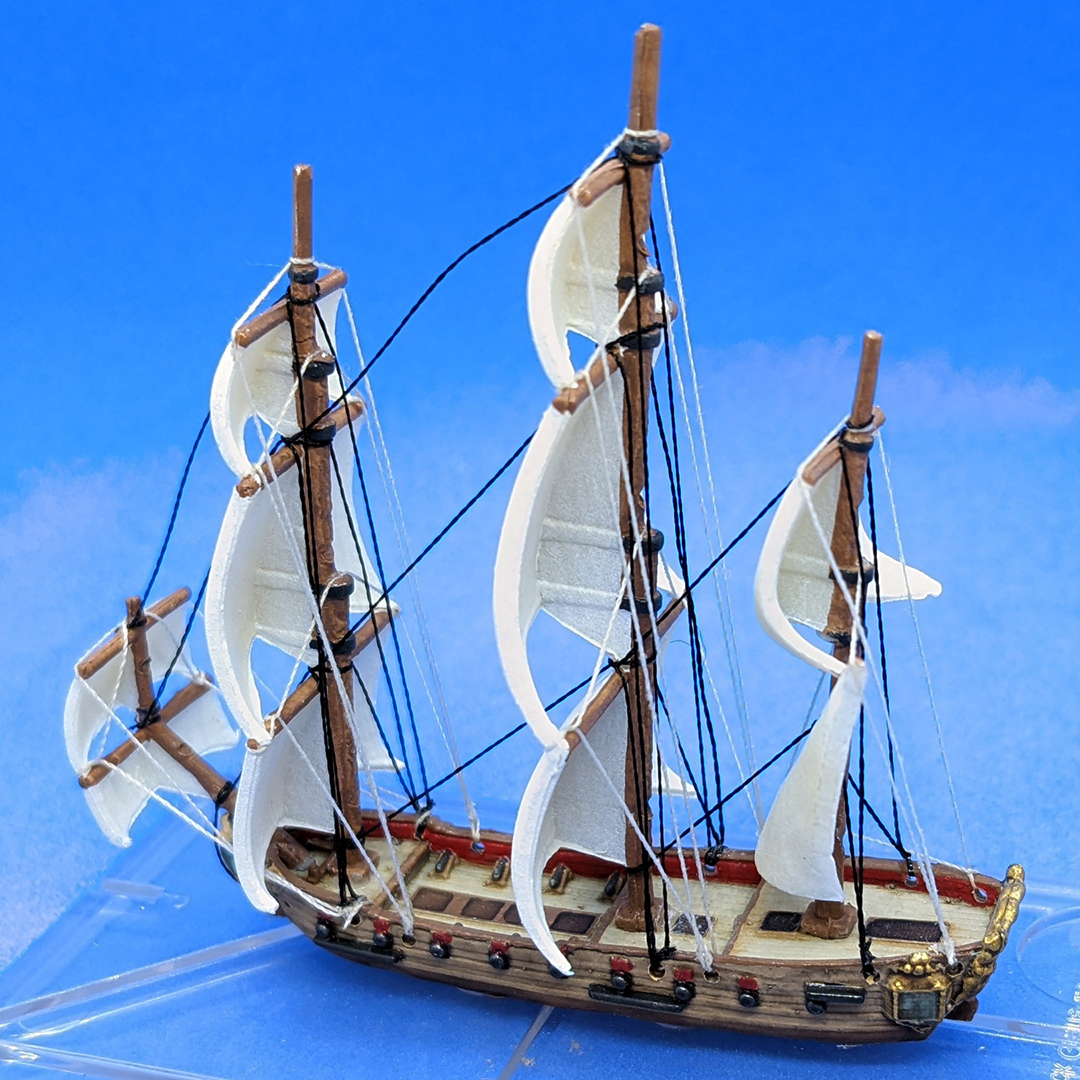
When I started painting Oak & Iron miniatures, I didn't think I would be rigging them, I assumed they would be too small and the mast sculpts to simple to give good results. But they are really easy to rig and with a little extra effort, you can take your models to the next level.
Ship rigging can be split into two types.
- Standing rigging supports the masts. The rope used doesn't need to be flexible and so is coated in black tar making it more resistant to rotting in the saltwater environment.
- Running rigging is used to control the sails and needs to easily run though blocks, so it can't be tarred. This rigging is brown or beige in color depending on the raw materials used.
This tutorial will show you how to add running rigging to your ships. If you haven't already you should complete the standing rigging first.
There are many rigging tutorials available online, including some fantastically detailed plans covering the national differences to rigging design. The following method is a simpler system, aiming to find a good balance between looks and practicality. I 'paint to play' so do things to tabletop quality, if this is what you're after then this could be the tutorial for you. As always if you have any questions or feedback, please feel free to leave a comment at the bottom of this page or reach out to me on the Oak & Iron Facebook group and I'll reply when I get a chance.
What you will need
You will be using the same tools as the standing rigging guide. You should complete the standing rigging before starting the running rigging. I am using beige cotton for the running rigging in this example.
Making holes
The first task is to make six new holes for the running rigging. On a real ship the lines would not come down to the deck at the same place as the shrouds. You want to place the new holes behind each mast as shown below. Note that not every ship model will have space to place new holes at the stern of the ship, in that case just use the same holes as the standing rigging. Use the same method as with the standing rigging to drill the holes.
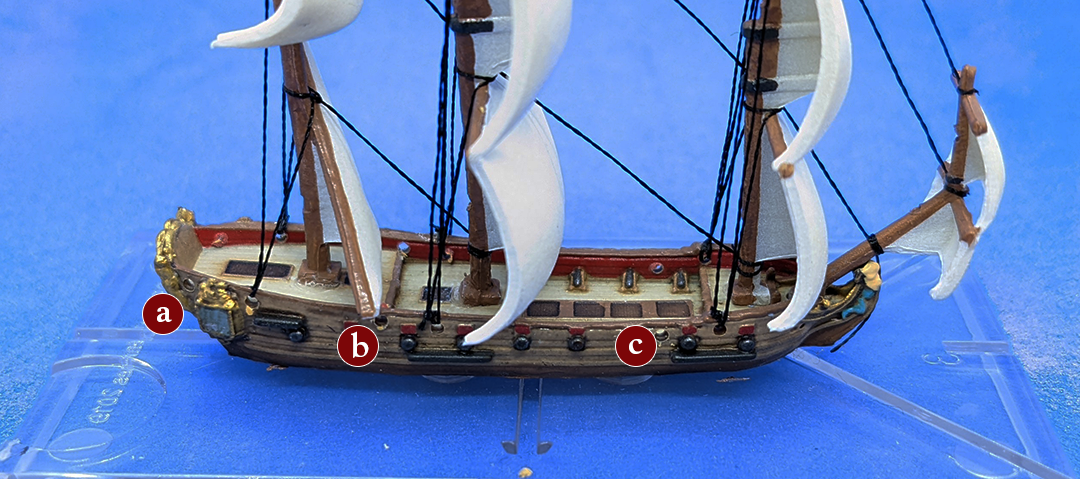
On the 6th rate there is space to drill a hole at the stern for the mizzen rigging. The main and fore mast rigging holes are placed in the gap between two cannons.
Rigging
I recommend starting with the mizzen mast and moving forward, but for this guide I am going to start with the main mast (#2).
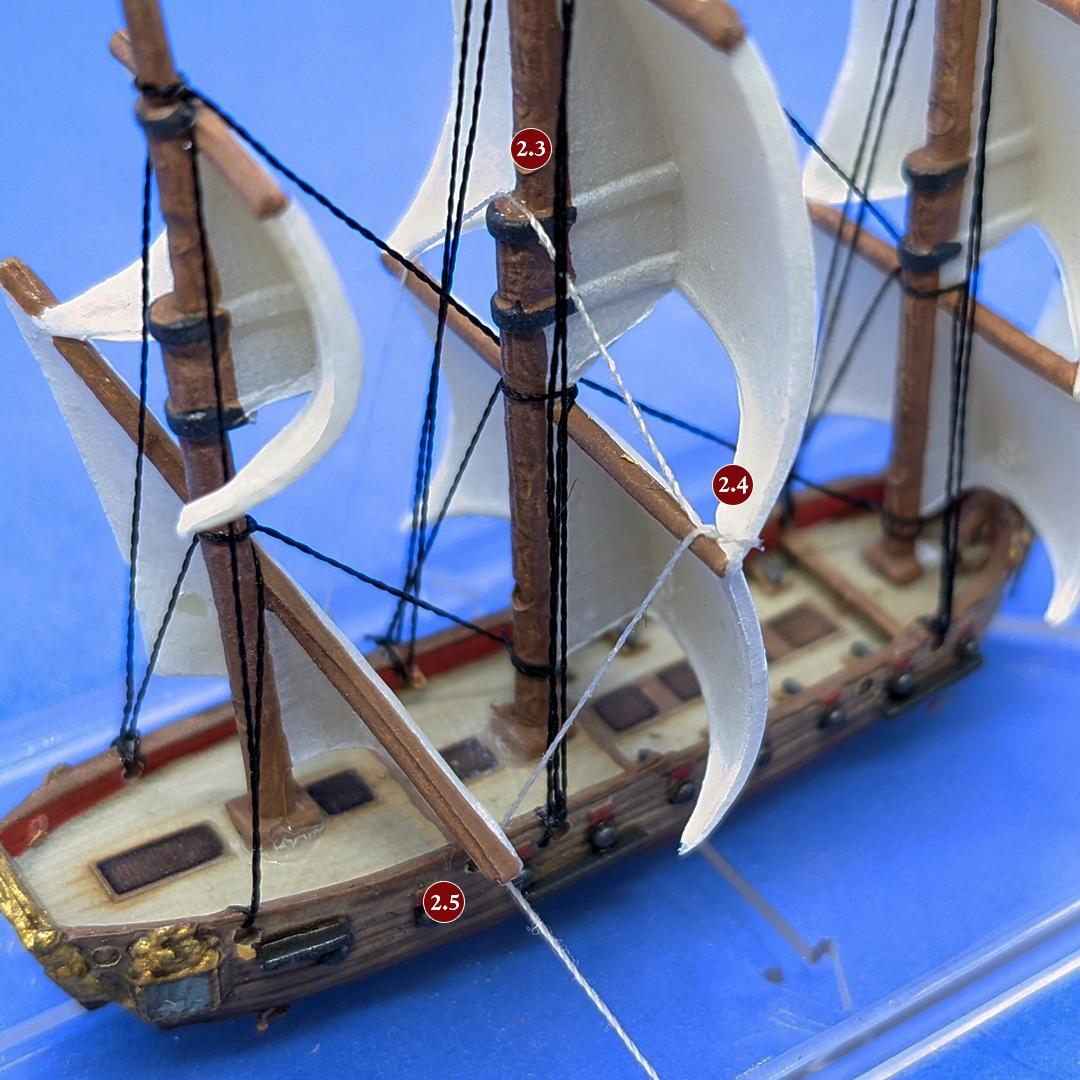
Thread the cotton though the hole at 2.1 then tie and glue. Then pass the cotton though the gap between the course (bottom) and topsail (middle) at 2.2 and tie a knot.
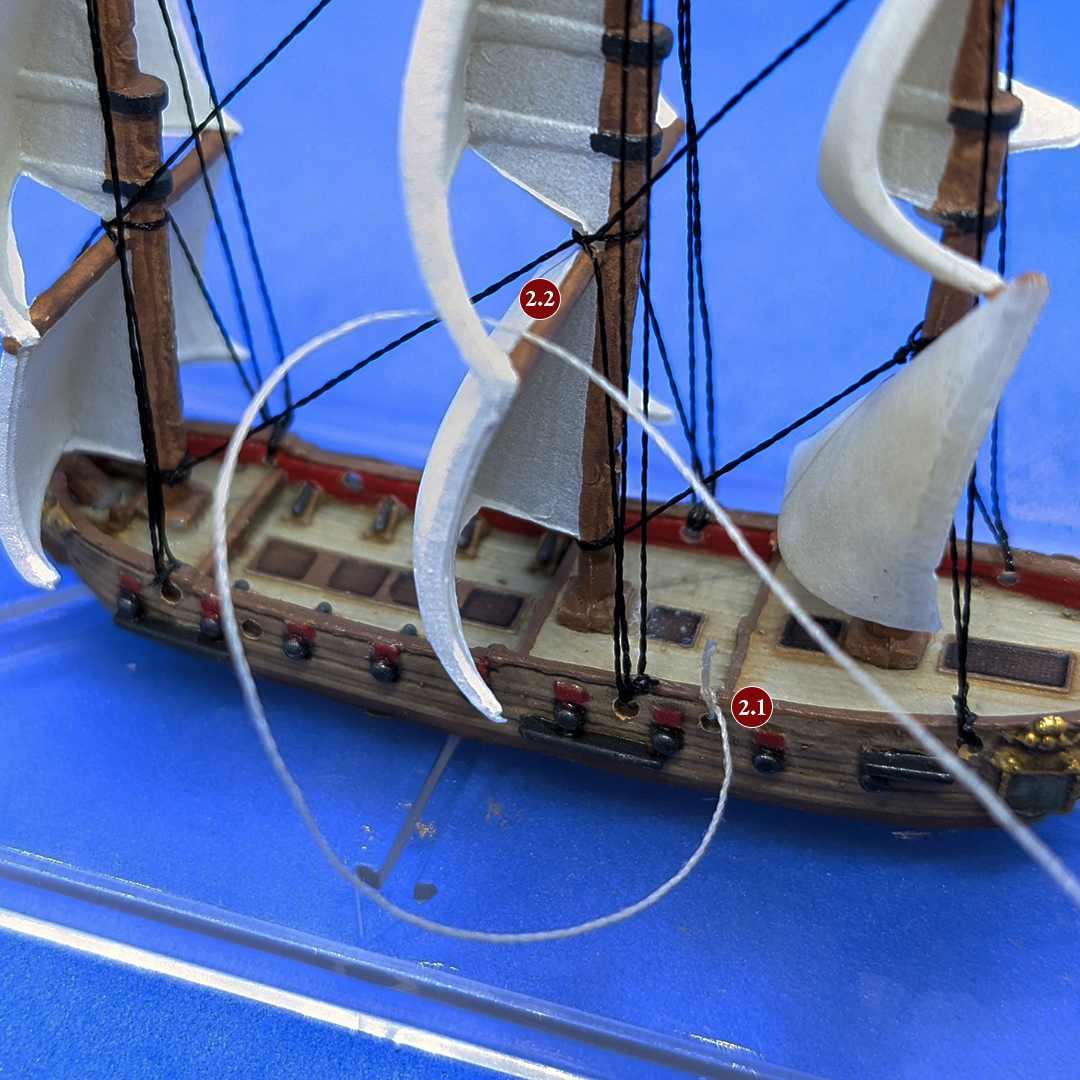
Next take the cotton over the lip on the mast at 2.3, make sure the cotton is inside the standing rigging (tweezers are very useful here).
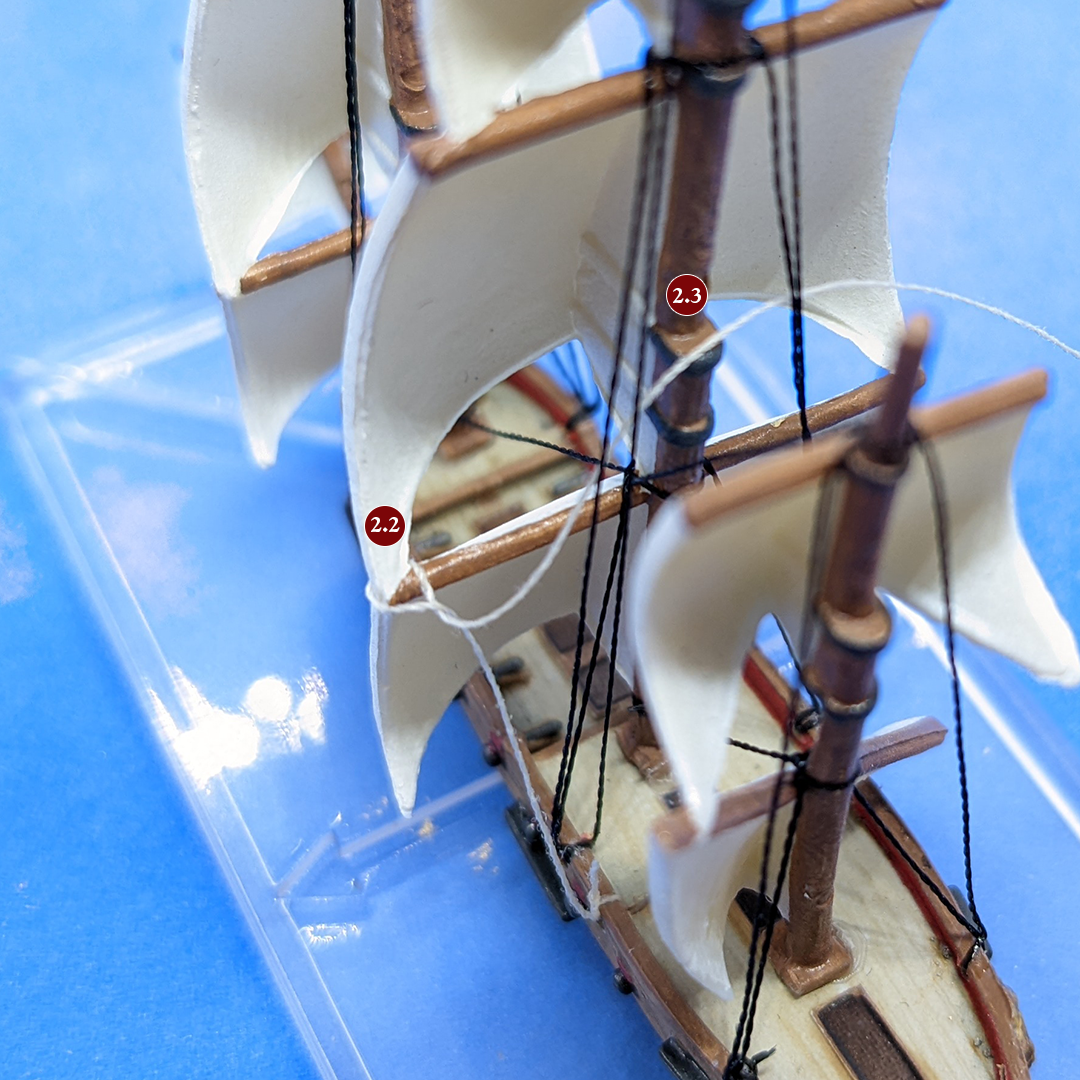
Pull the cotton tight and add a spot of glue at 2.3 to hold it in place, then repeat threading the cotton between the course and topsail like step 2.2.
Then thread the cotton though the hole at 2.5. The course sail rigging is complete.
Repeat the exact same process with the next level up as shown below. Use the same thread though and tie at 2.6 and 2.8, and a spot of glue at 2.7. Again remember to thread the cotton between the mast and the standing rigging as shown. Finally thread though the hole at 2.9.

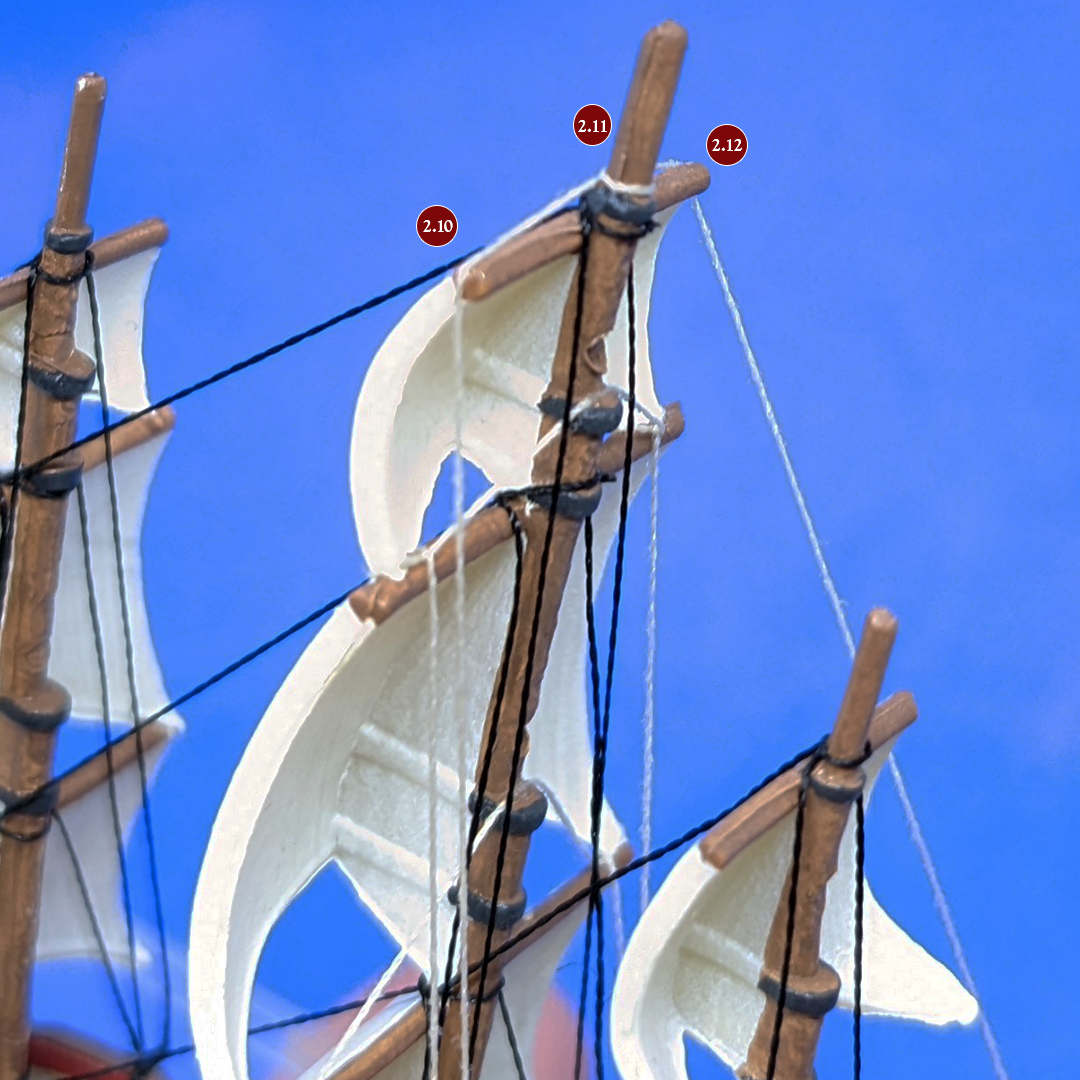
The final level (topgallant sail) uses a different technique. There is no hole to thread though and tie, so instead add a spot of glue at 2.10 and 2.12, then guide the thread over the end of the yard. It takes some practise to get it in the right place, so it's worth dry fitting before adding the glue. At 2.11 simply wrap the cotton around the past once. Once 2.12 is complete take the cotton back down to the hole tie and glue.
The same techniques are used for the other masts and bowsprit simply repeat the process using the image below as a guide and don't worry if it isn't exactly right. There was some variation on how ships were rigged and the goal is to give the impression of a rigged ship not an exact model.