Last updated on March 2nd, 2026 at 08:06 pm
When I started painting Oak & Iron miniatures, I didn't think I would be rigging them, I assumed they would be too small and the mast sculpts to simple to give good results. But they are really easy to rig and with a little extra effort, you can take your models to the next level.
Ship rigging can be split into two types.
- Standing rigging supports the masts. The rope used doesn't need to be flexible and so is coated in black tar making it more resistant to rotting in the saltwater environment.
- Running rigging is used to control the sails and needs to easily run though blocks, so it can't be tarred. This rigging is brown or beige in color depending on the raw materials used.
This tutorial will show you how to add standing rigging to your ships, with the running rigging covered in a follow up article.
There are many rigging tutorials available online, including some fantastically detailed plans covering the national differences to rigging design. The following method is a simpler system, aiming to find a good balance between looks and practicality. I 'paint to play' so do things to tabletop quality, if this is what you're after then this could be the tutorial for you. As always if you have any questions or feedback, please feel free to leave a comment at the bottom of this page or reach out to me on the Oak & Iron Facebook group and I'll reply when I get a chance.
Tools
You will need a few tools to rig your ships, detailed below.

Black cotton thread
Standing rigging was coated in tar to help protect it from rotting. I use Gutermann Sew-all Sewing thread, but any high-quality thread will work well.
Superglue
I find liquid works better than gel superglue.
Wooden cocktail stick / toothpicks
These are used to apply glue. Use a non-porous surface and make a puddle of glue (old blister packs are fantastic for this). Then dip the cocktail stick in the glue and use that to apply a spot of glue to the model where needed. This allows great control over where and how much glue is applied. Glue will build up on the end of the cocktail stick so replace it when necessary. The puddle of glue will become tacky as the solvent evaporates, so create a new one as needed. I tend to make small puddles and replace them once or twice per model.
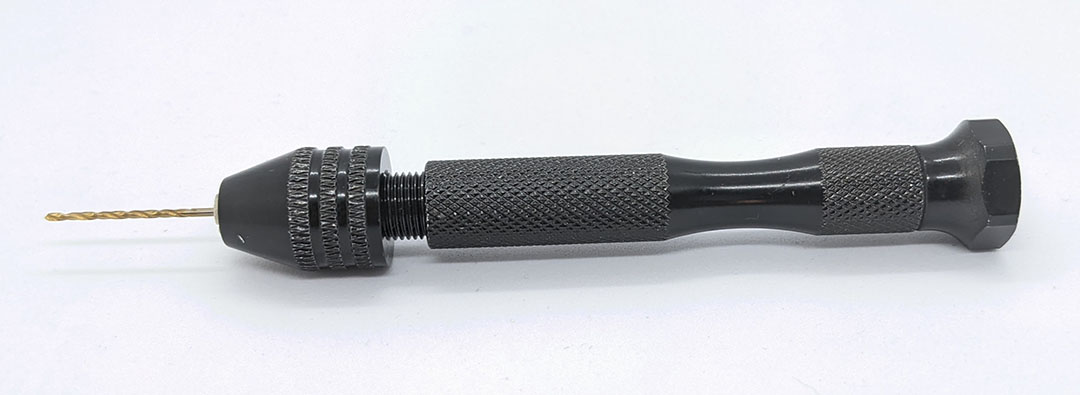
Pin vice and 1mm bit
I used a cheap pin vice bought on Ebay, but I found the bits that came with it were terrible, so I bought some higher quality bits separately. Having played around with a few sizes I find 1mm the best. A decent quality drill bit makes all the difference and is well worth buying.
Small scissors
I bought a fancy pair of thread snips but the best scissors I have for this job are the ones on my Swiss army knife, they are sharp, and small enough to get into the model where needed.
Needle nose tweezers
These are useful for getting the thread in tight places and removing the flash from drilled holes.
Blue tack / poster putty
Used to hold the model in place when you need an extra hand free. I really like the ability to place the model at the best angle to access what I'd doing, and blue tack gives you total flexibility with good hold.
Reading glasses
Optional but recommended. I have a pair of +3 non-prescription reading glasses that allow me to get really close to the model, fantastic for painting and rigging.
Making holes
The first task is to drill six holes in the ship hull to anchor the shrouds. Each pair of holes should be drilled behind the mast and high enough in the hull that they will be above the deck (you'll need access to both sides of the hole). Use the pin vice to drill each hole, this can be done before or after painting (I drill after painting and vanishing). Once each hole is drilled use the tweezers to remove any flash from the exit side of the hole.
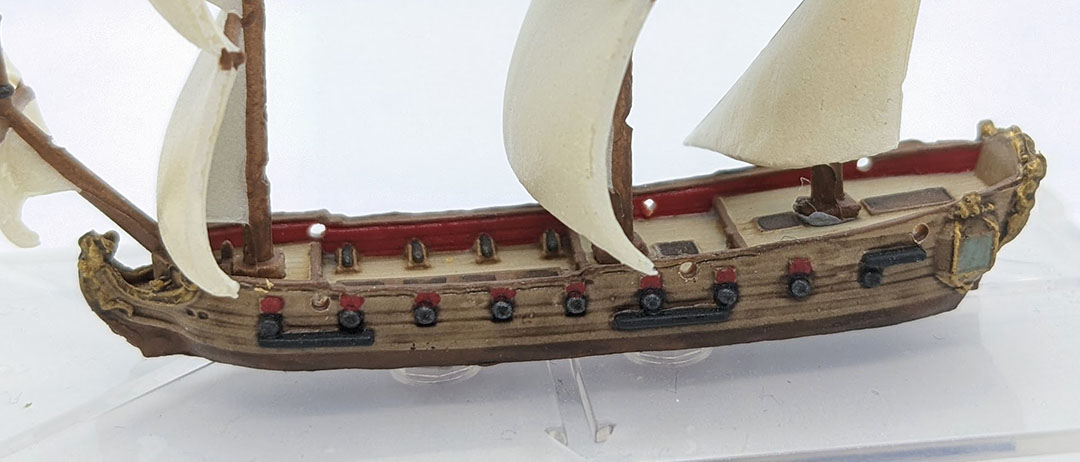
In a real ship the shrouds are attached to the chains, platforms on the side of the hull that help widen the angle of the shrouds and provide a useful standing platform when using a lead and line. The chains are included in the models (black in the image above) and can be used as a positioning guide for the holes.
The plastic used for the hulls is quite soft, not much pressure is needed to drill though them. Use light pressure and take your time to avoid damaging the model or paintwork.
Stays
The standing rigging that runs fore and after (front to back) are called stays, used to stop the mast falling backwards.
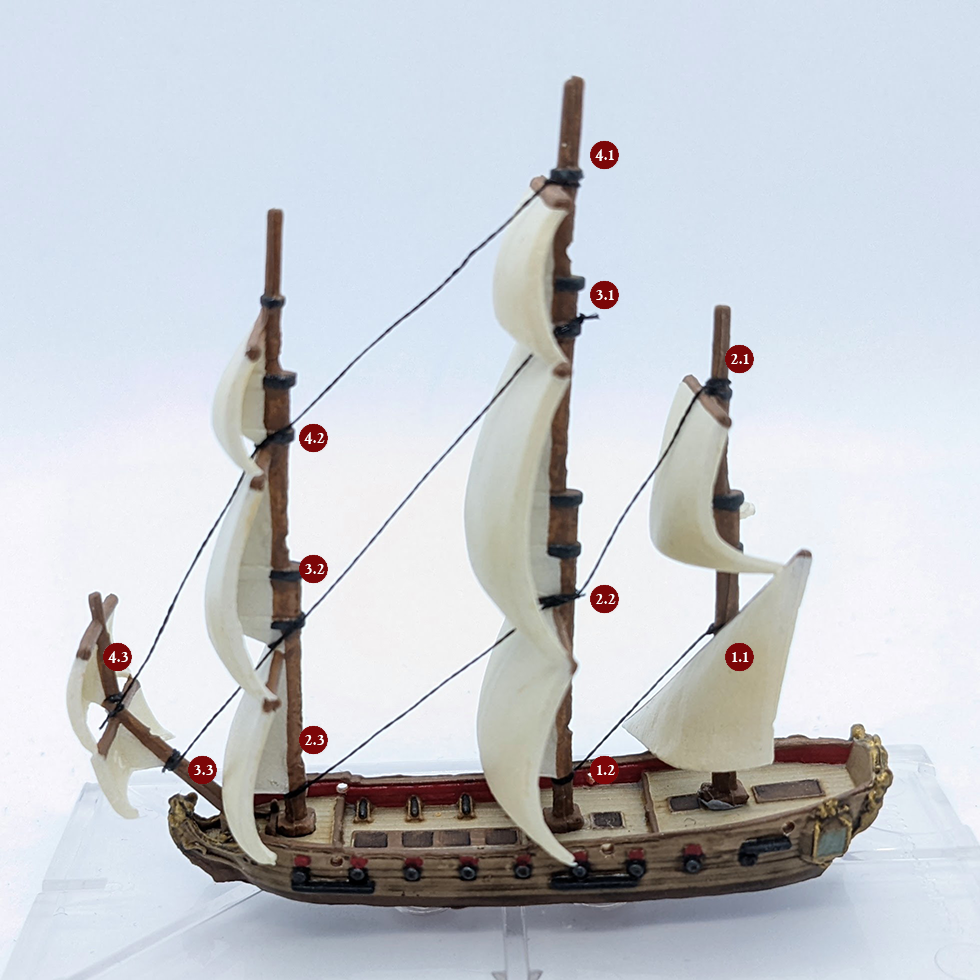
On a three masted model we are going to use four bits of thread to create the stays, starting from stern (back) to bow (front).
Knots
I use a strangle knot when tying rigging. This knot is simple to tie and does not loosen easily, giving you time to add a spot of glue to lock the knot.
Animated guide to tying a strangle knot
Method
Cut a good length piece of thread from the reel, approximately 1 meter or yard. This will give you plenty to work with without being messy.
Tie a knot at position 1.1, then add a spot of glue using the cocktail stick. Cut the loose end short so it doesn't get in the way but leave about 1cm / half an inch, this will be useful if something goes wrong, giving you a bit of space to retie the knot or fix any problems.
Wrap the other end of the thread around the mast at 1.2, going around the mast twice and always coming over the top (above) the stay, this will help push the stay towards the bottom of the mast. Pull the thread tight and use your thumb to hold it in place while you add a spot of glue to lock it (as shown in the picture below). Give the glue 5-10 seconds to dry before releasing the thread.
After 30 seconds the glue should be fully dry, and you can trim the ends as close to the mast as possible as shown below.

Once the first stay is complete you can start the remaining steps using the process below.
- Tie a knot then glue and trim at 1.1 (completed above)
- Wrap, glue then trim at 1.2 (completed above)
- Tie a knot then glue and trim at 2.1
- Wrap and glue but don't trim at 2.2
- Wrap, glue then trim at 2.3
- Tie a knot then glue and trim at 3.1
- Wrap and glue but don't trim at 3.2
- Wrap, glue then trim at 3.3
- Tie a knot then glue and trim at 4.1
- Wrap and glue but don't trim at 4.2
- Wrap, glue then trim at 4.3
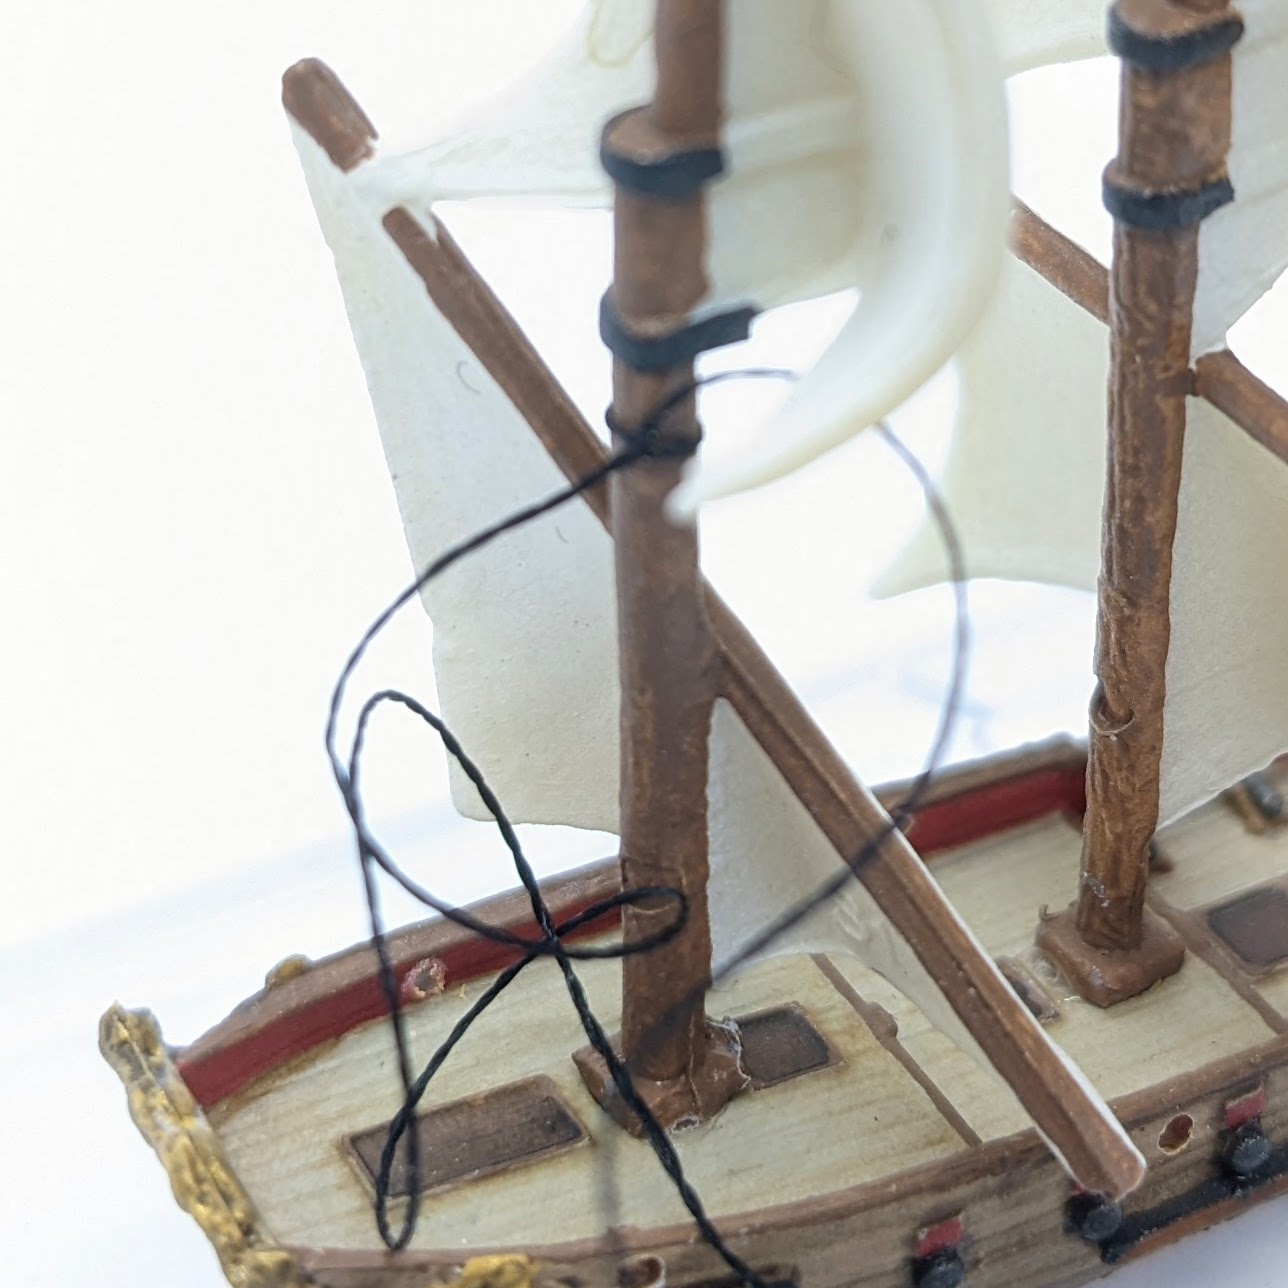
Don't worry if you have slack in the thread like in this picture. We can apply tension when adding the shrouds in the next step.
Shrouds
The shrouds prevent the mast falling forwards or sideways and must counter most of the force on the mast.

Starting with the mizzen mast, pass the thread though the hole at 1, tie a knot, glue then trim the loose end. Apply the glue to the knot and not in the hole as you will be threading though it multiple times.
Pass the thread up the mast to point 2, going round the front of the mast then back down the other side, there is no need to wrap the thread around the mast or apply glue.
Take the thread though the hole at 3, going from outside in is much easier than the other way around. again, no need to glue.
Pass the thread up to 4, going around the front of the mast again and then back down. Do not apply glue or wrap around the mast.
Finally go through the first hole again at 1/5, from the outside to the inside as before, then hold the thread so it comes back out across the top of the model and apply a spot of glue there to hold it in place. Before gluing adjust the tension of the shroud so it takes up the slack from the stay would bending the mast back too far. Trim both ends of the thread once the glue is dry.
The above process is used on the remaining two masts. Note that the mizzen has two levels of sail but the main and fore mast have 3 and so you will need to extend the process with step 5 above working like step 3, then step 6 and 7 copying 4 and 5.
In each case the shrouds on a single mast should be made from a single piece of thread and only tied / glued at the start and end.

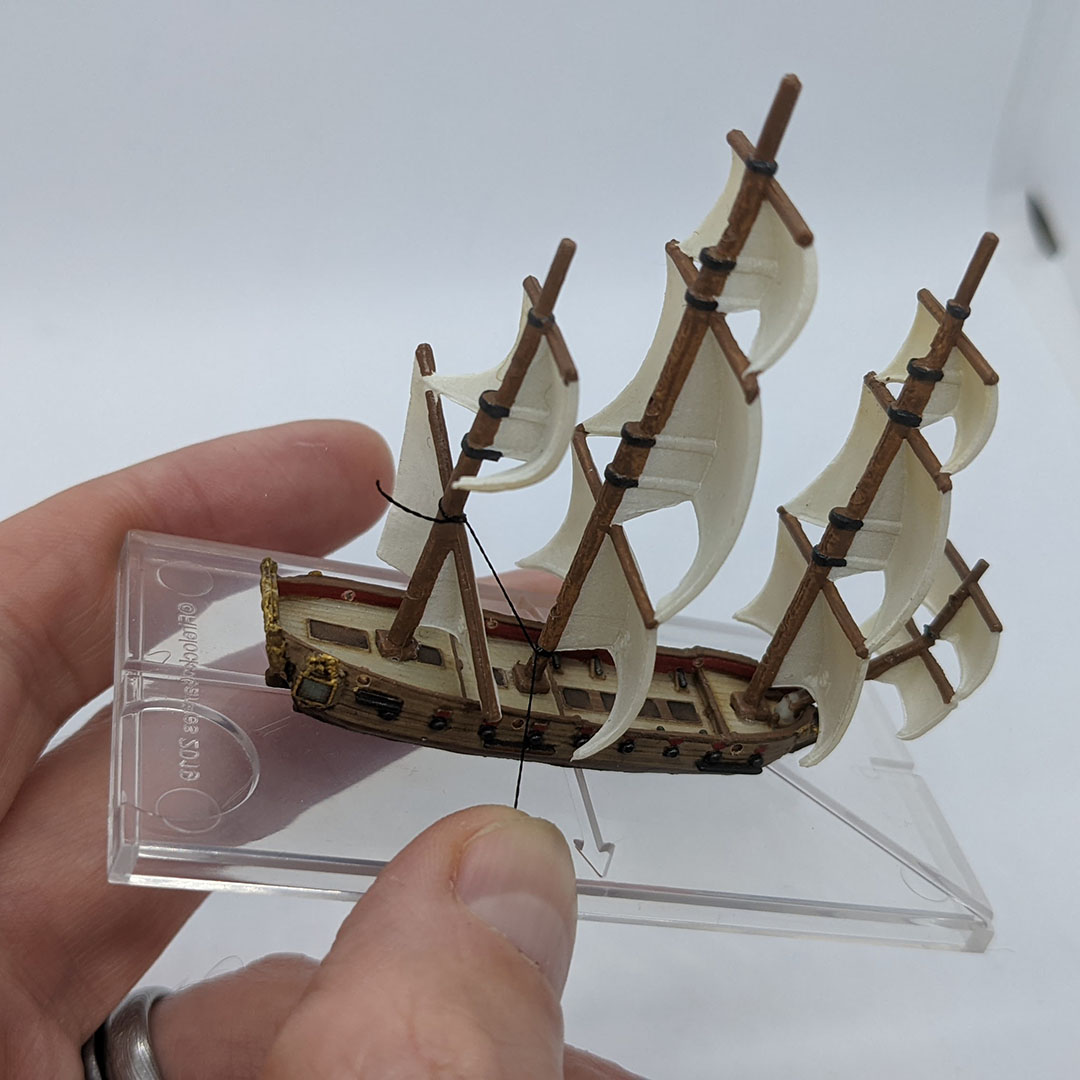
Completed standing rigging on the model.
In part two we will add running rigging to the model, using a lighter colour thread.
Pingback: Oak & Iron running rigging – Paul Kingtiger