Last updated on June 28th, 2026 at 10:55 am
I wanted to make removable flags for my Black Seas ships so that I could have a flexible fleet, able to provide two medium size forces when I'm supplying all the models and a single large fleet when playing against other collections. To make my flags removable I have glued magnets to the ship models, and built my flags around metal 'flag poles' made from paperclips.
Table of Contents
Flags sheets
I have created a set of flag templates for several factions which can be downloaded below. These include flags not available from Warlord, such as pre-act of union Britain and the Kingdom of France.
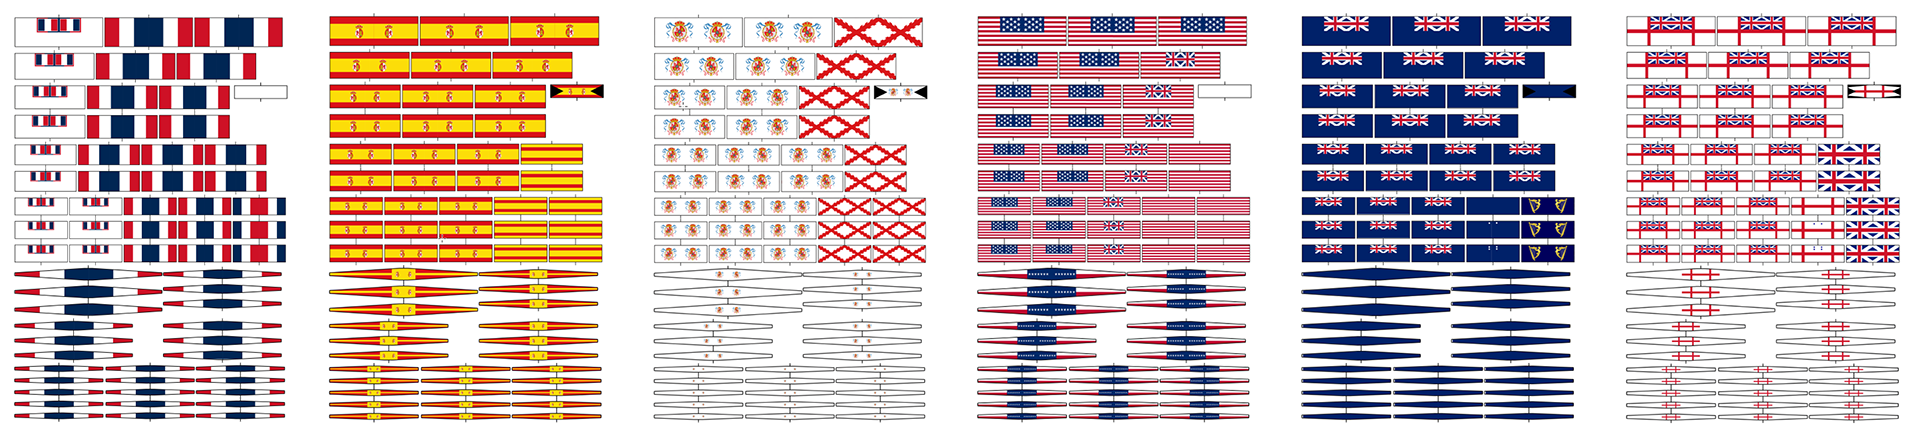
Current flag sheets
Building the flags
You will need
- Craft knife.
- Straight edge or ruler.
- Cutting mat or something safe to cut on.
- Normal paperclips.
- A pair of wire cutters suitable for cutting paperclips.
- PVA glue.
- Hobby paints, gloss and mat varnish (airbrush or brush, not rattle can).
Flag sheets
Cut out and fold
Take your flag sheet and cut out all the flags. I've build my sheet so that the top and bottom of each flag lines up and you can cut the entire row with a craft knife. To cut the short edges I prefer to use a small pair of scissors.
You don't have to be super neat here as any mistakes will add to the 'flapping in the wind' effect. But you do want to cut inside the black lines (so that the finished flag has no black border).
Once cut out fold each flag in half. If your cutting out isn't super accurate you can use the design on the flag to find the middle. Holding the flag up to the light can help see the design on both sides.
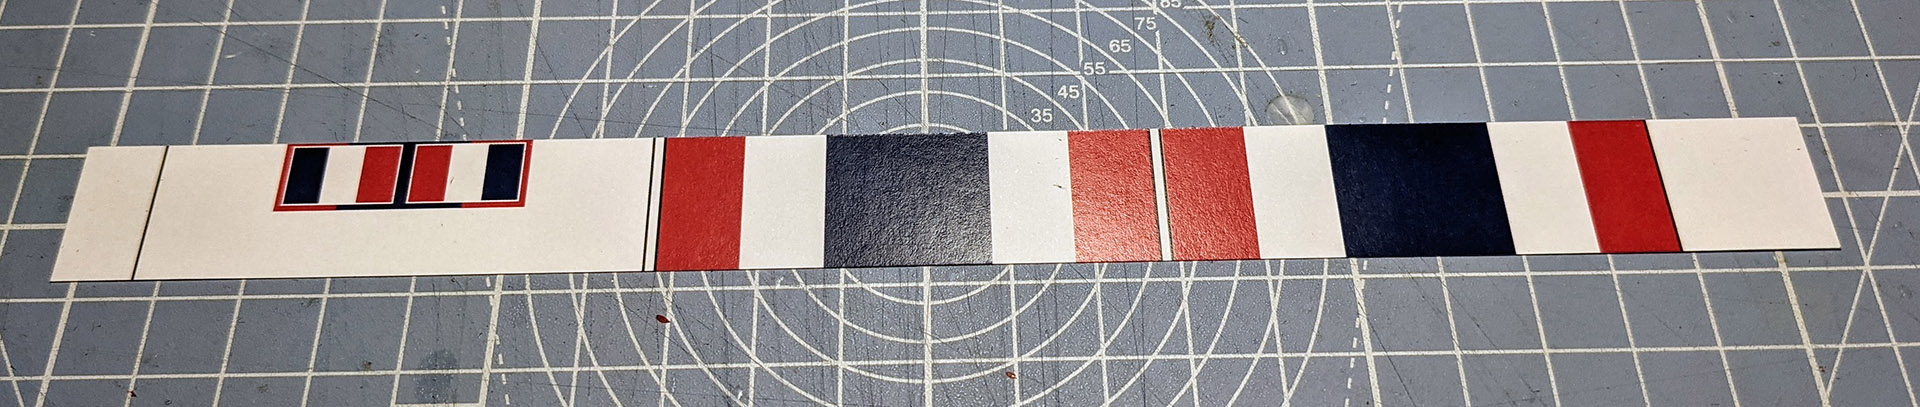
A single row of flags cut up top and bottom with a knife.
Use scissors to complete the cuts for each flag.
Each flag folded and ready to be glued.
Prepare the paperclips
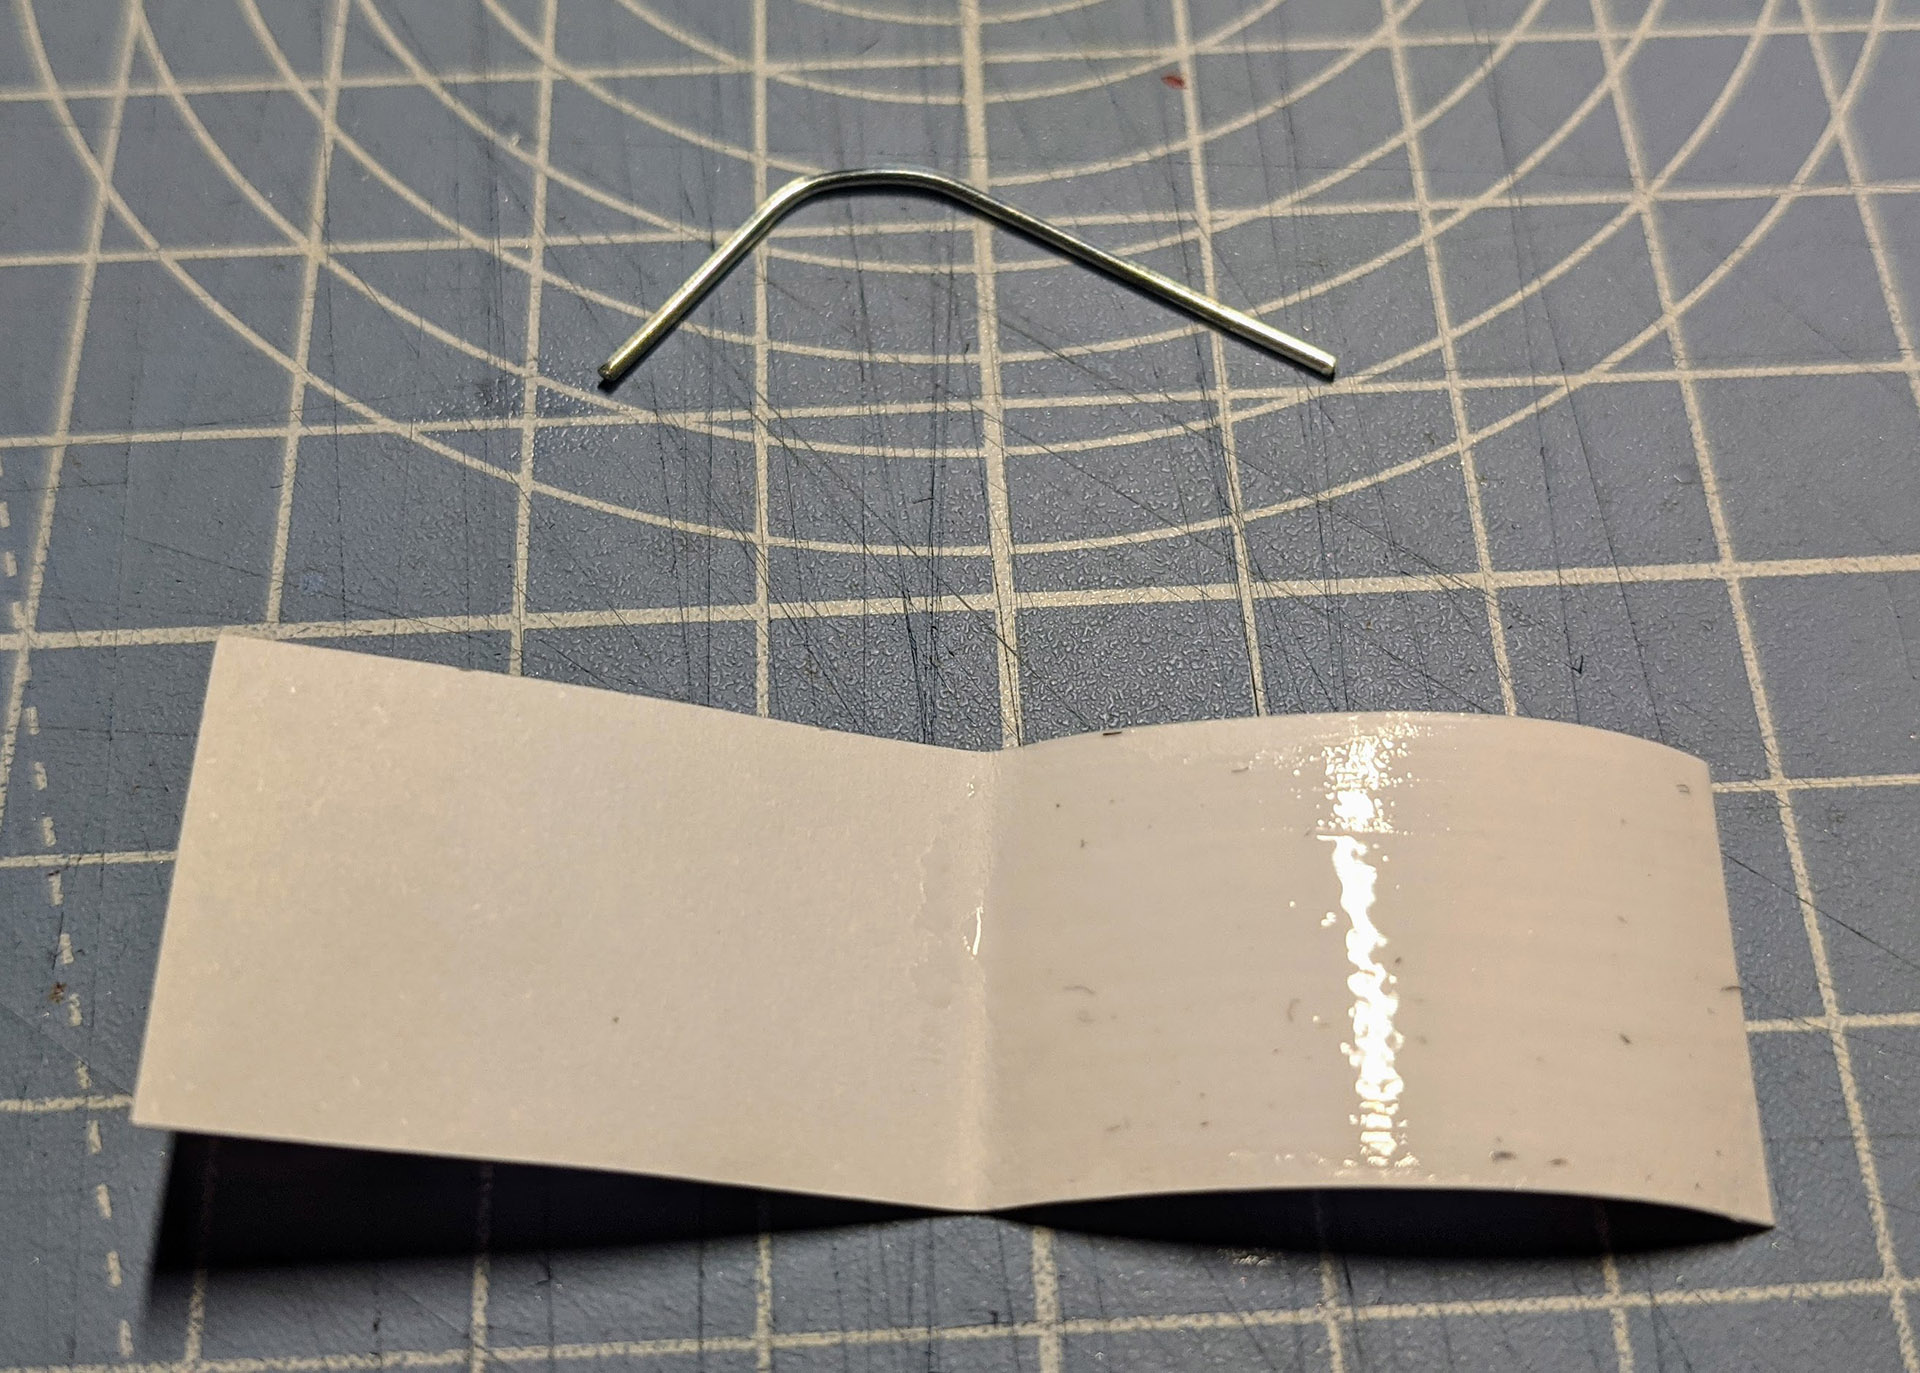
Each flag has a 'flag pole' made from a paperclip. This is the metal that will stick to the magnet.
You will need to fold out and cut each paperclip to produce an L shape ready for two flags. I prefer to do a bunch of these as a batch job and store them in a baggy (this can take some time so get a podcast going).

Any normal paperclip will work.
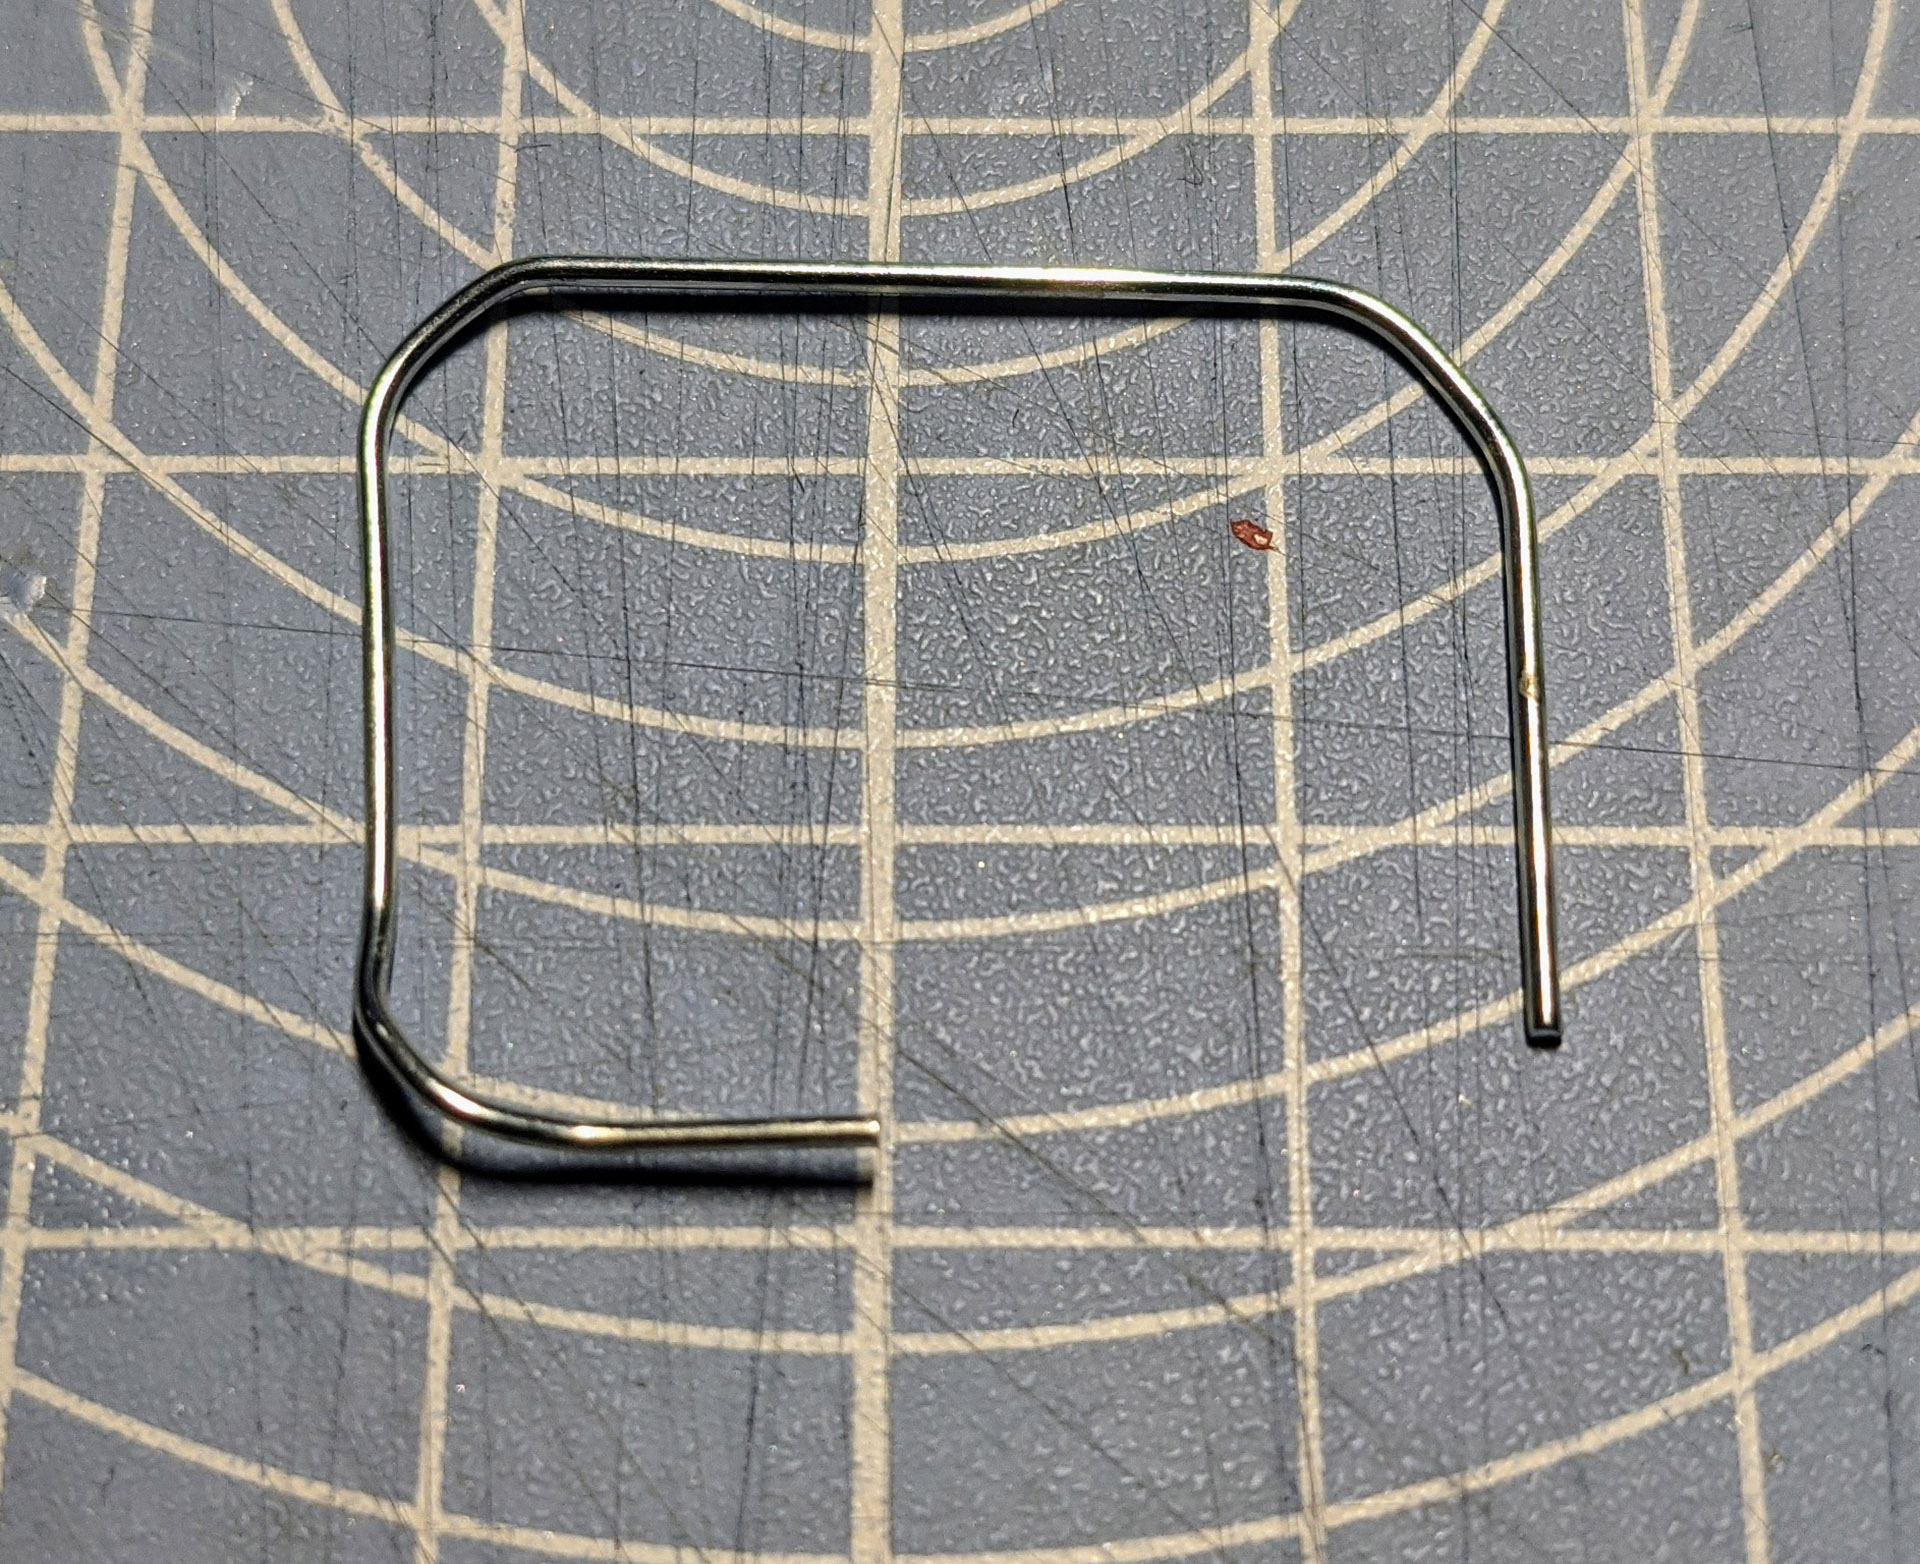
Fold open the paperclip to form a square.
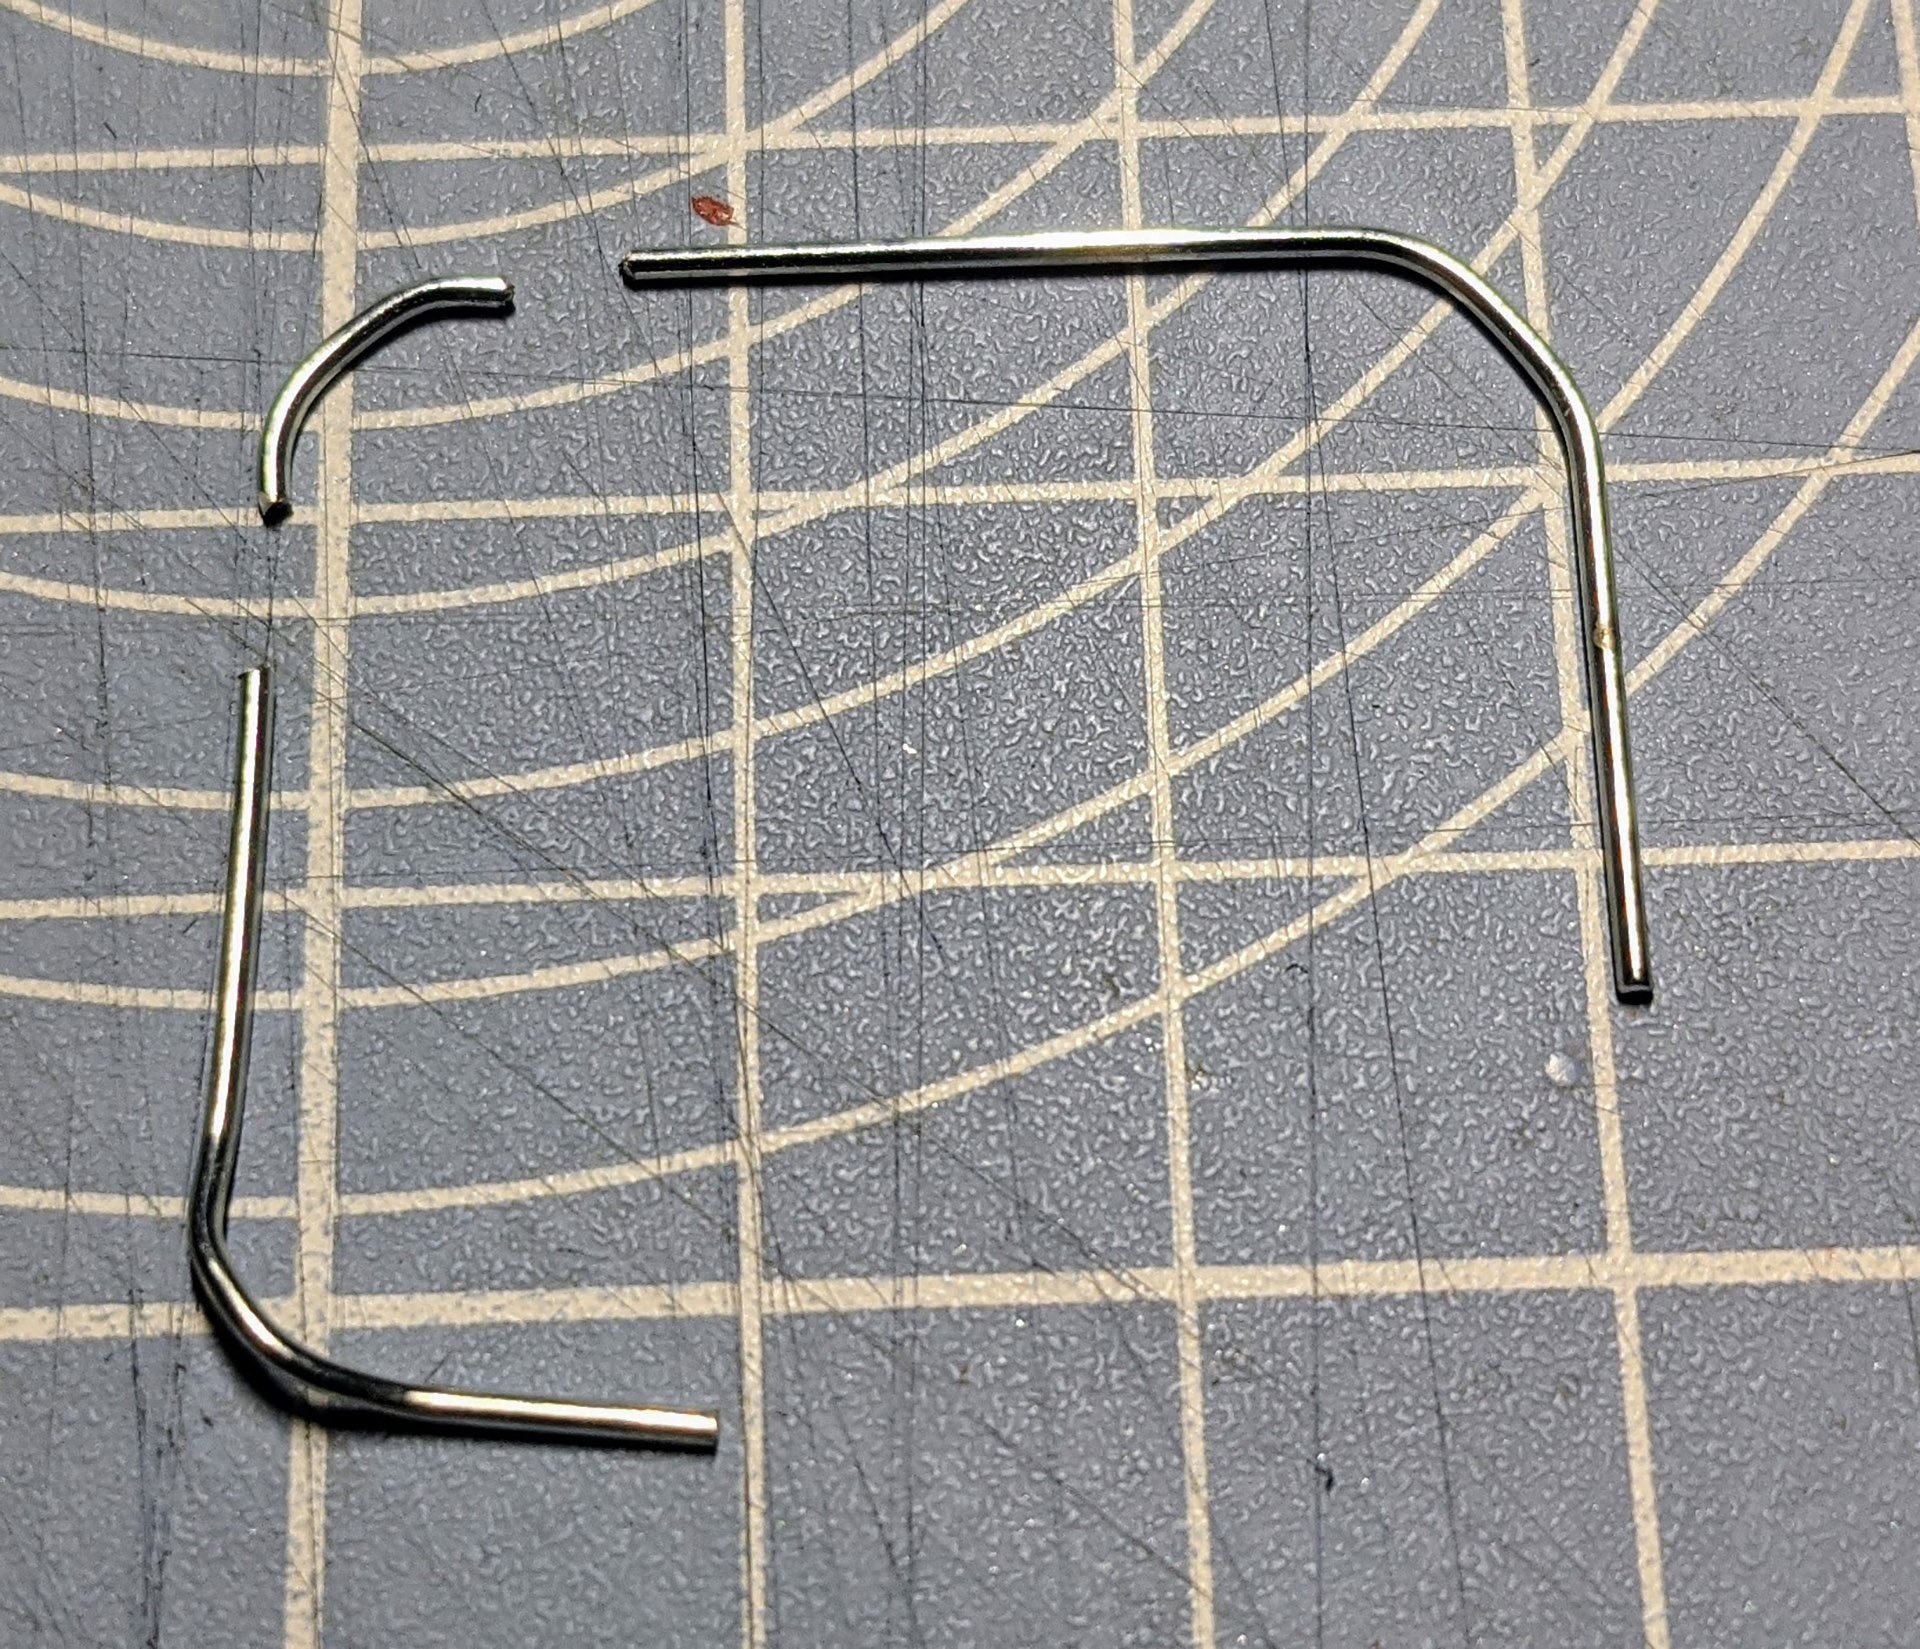
Cut the paperclip as shown to produce two L shapes.
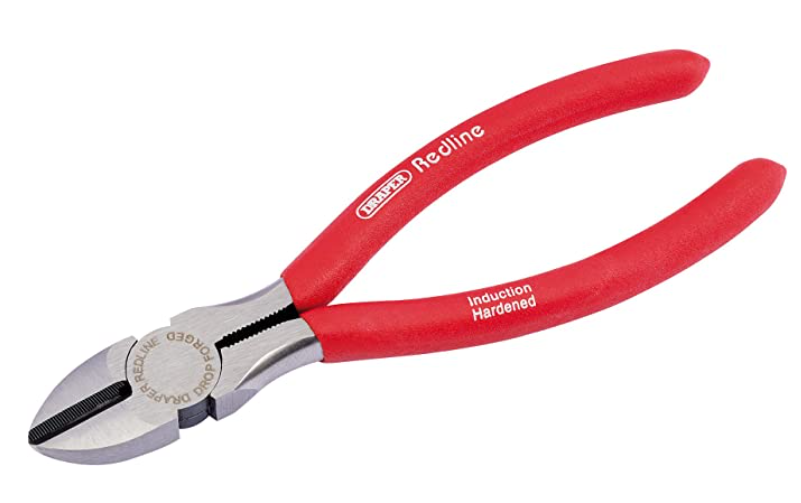
Use large wire cutters and cut the paperclip towards the base of the blade. Don't use sprue snips, they will be ruined.
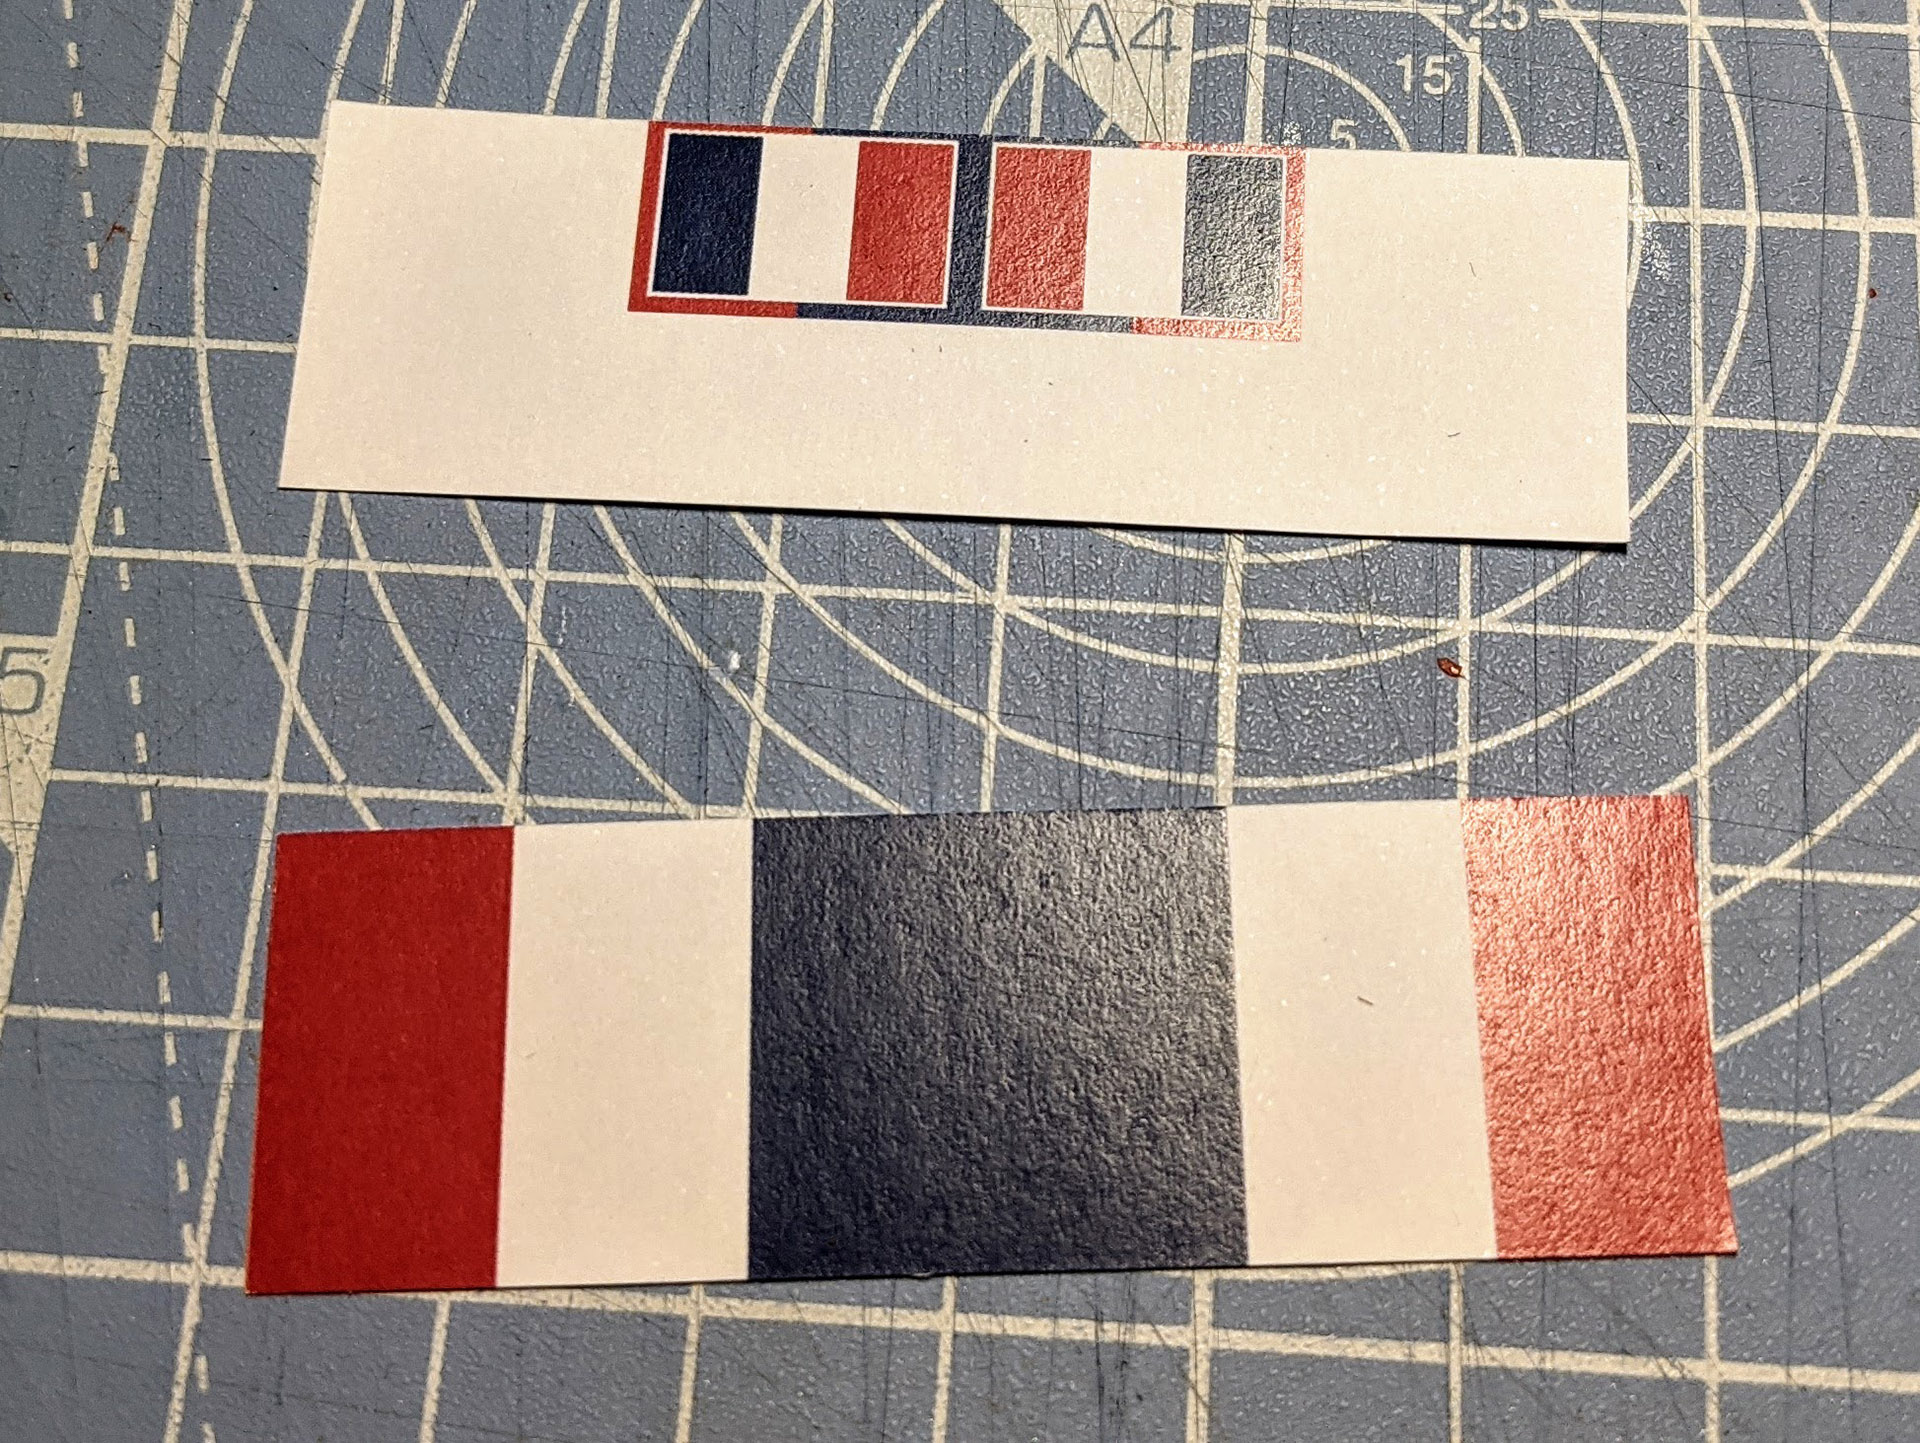
Glue to paperclips
I use undiluted PVA glue for the flags as it stiffens the final flag. Adding some water to the glue will make it easier to slide the glued paper to get it to line up.
Apply the glue to one side only, place the flag around the paperclip the close up.
Finally use a ruler or other thin, straight edge to push the flags together next to the paperclip.
Add PVA glue to one side of the flag only.

Fold the flag around the paperclip doing your best to line up the design.
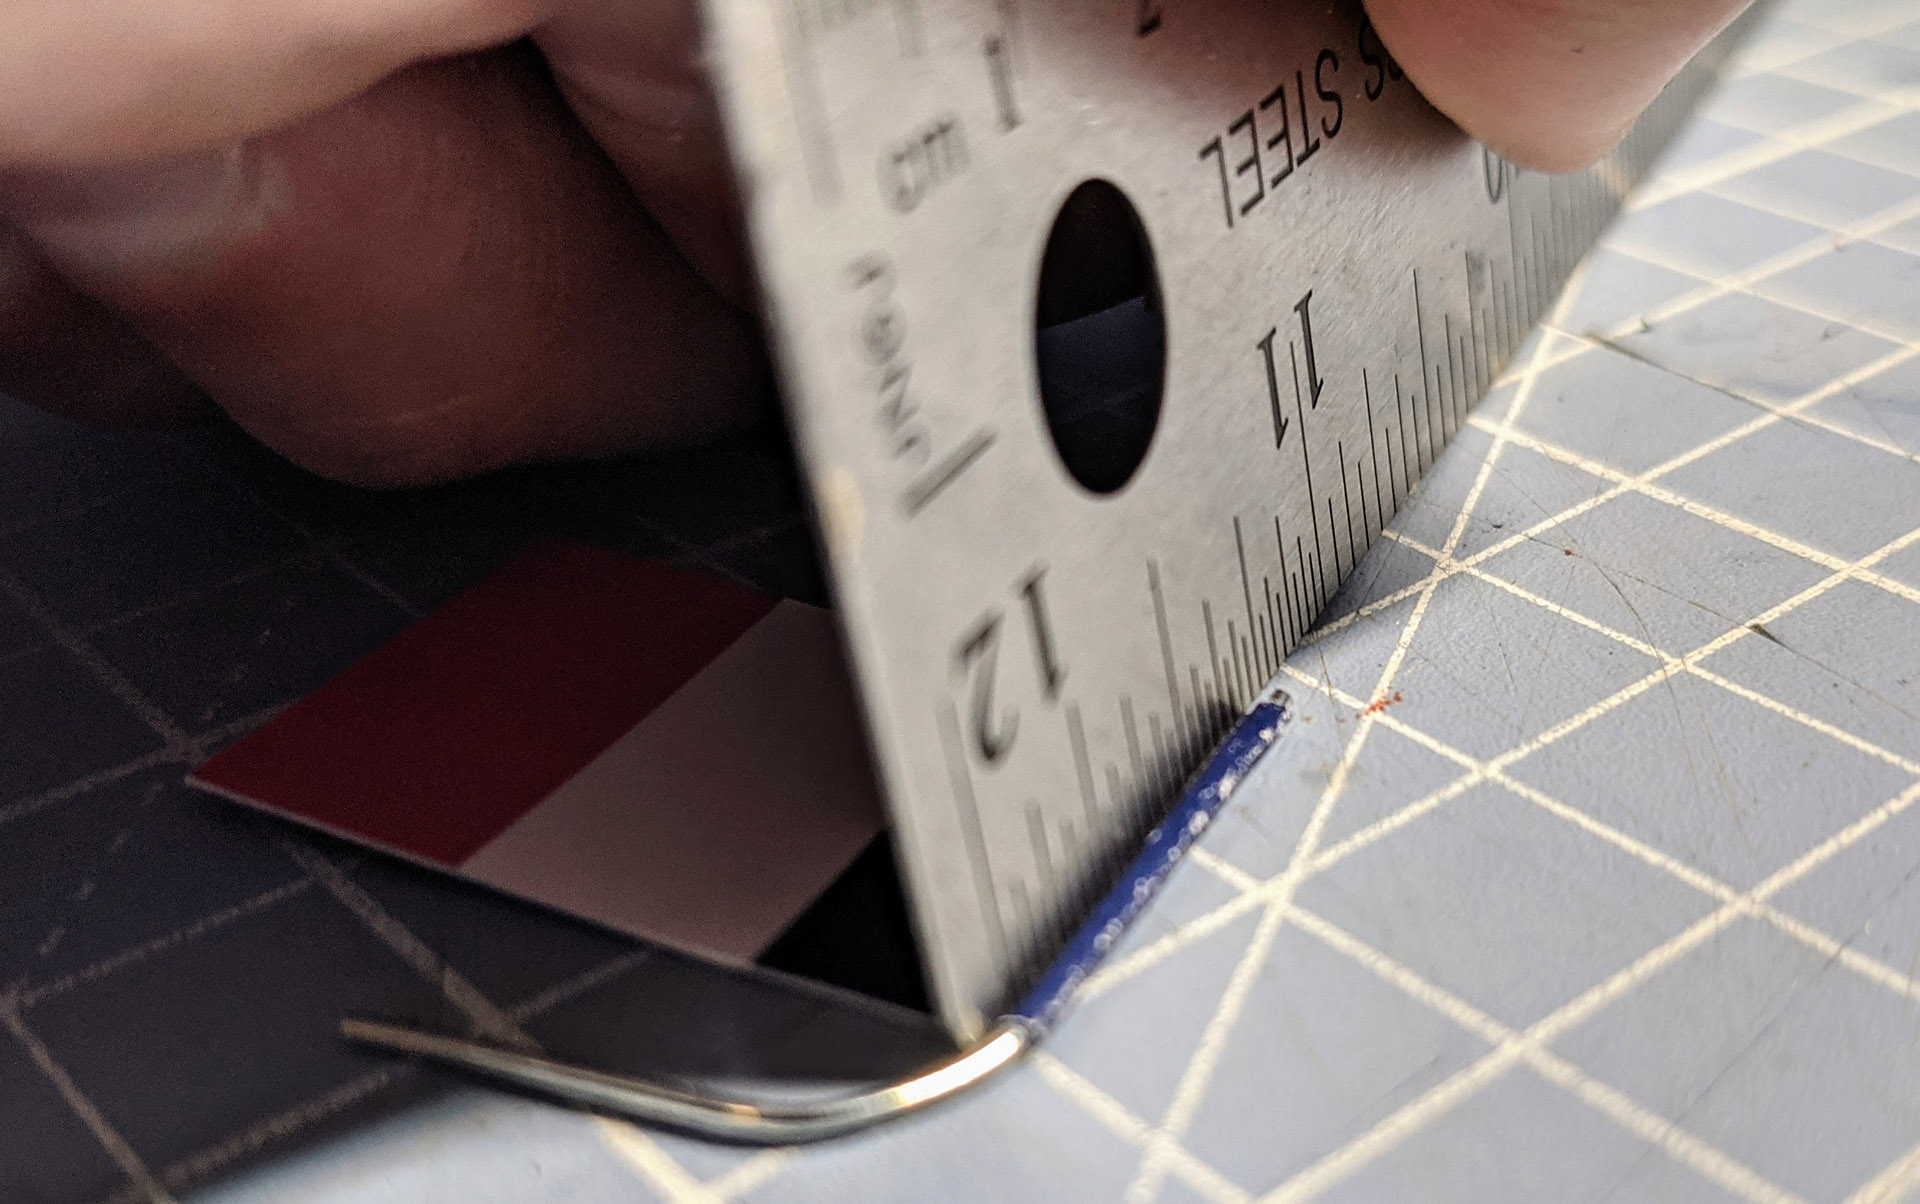
Use a ruler to form a crease in next to the paperclip.
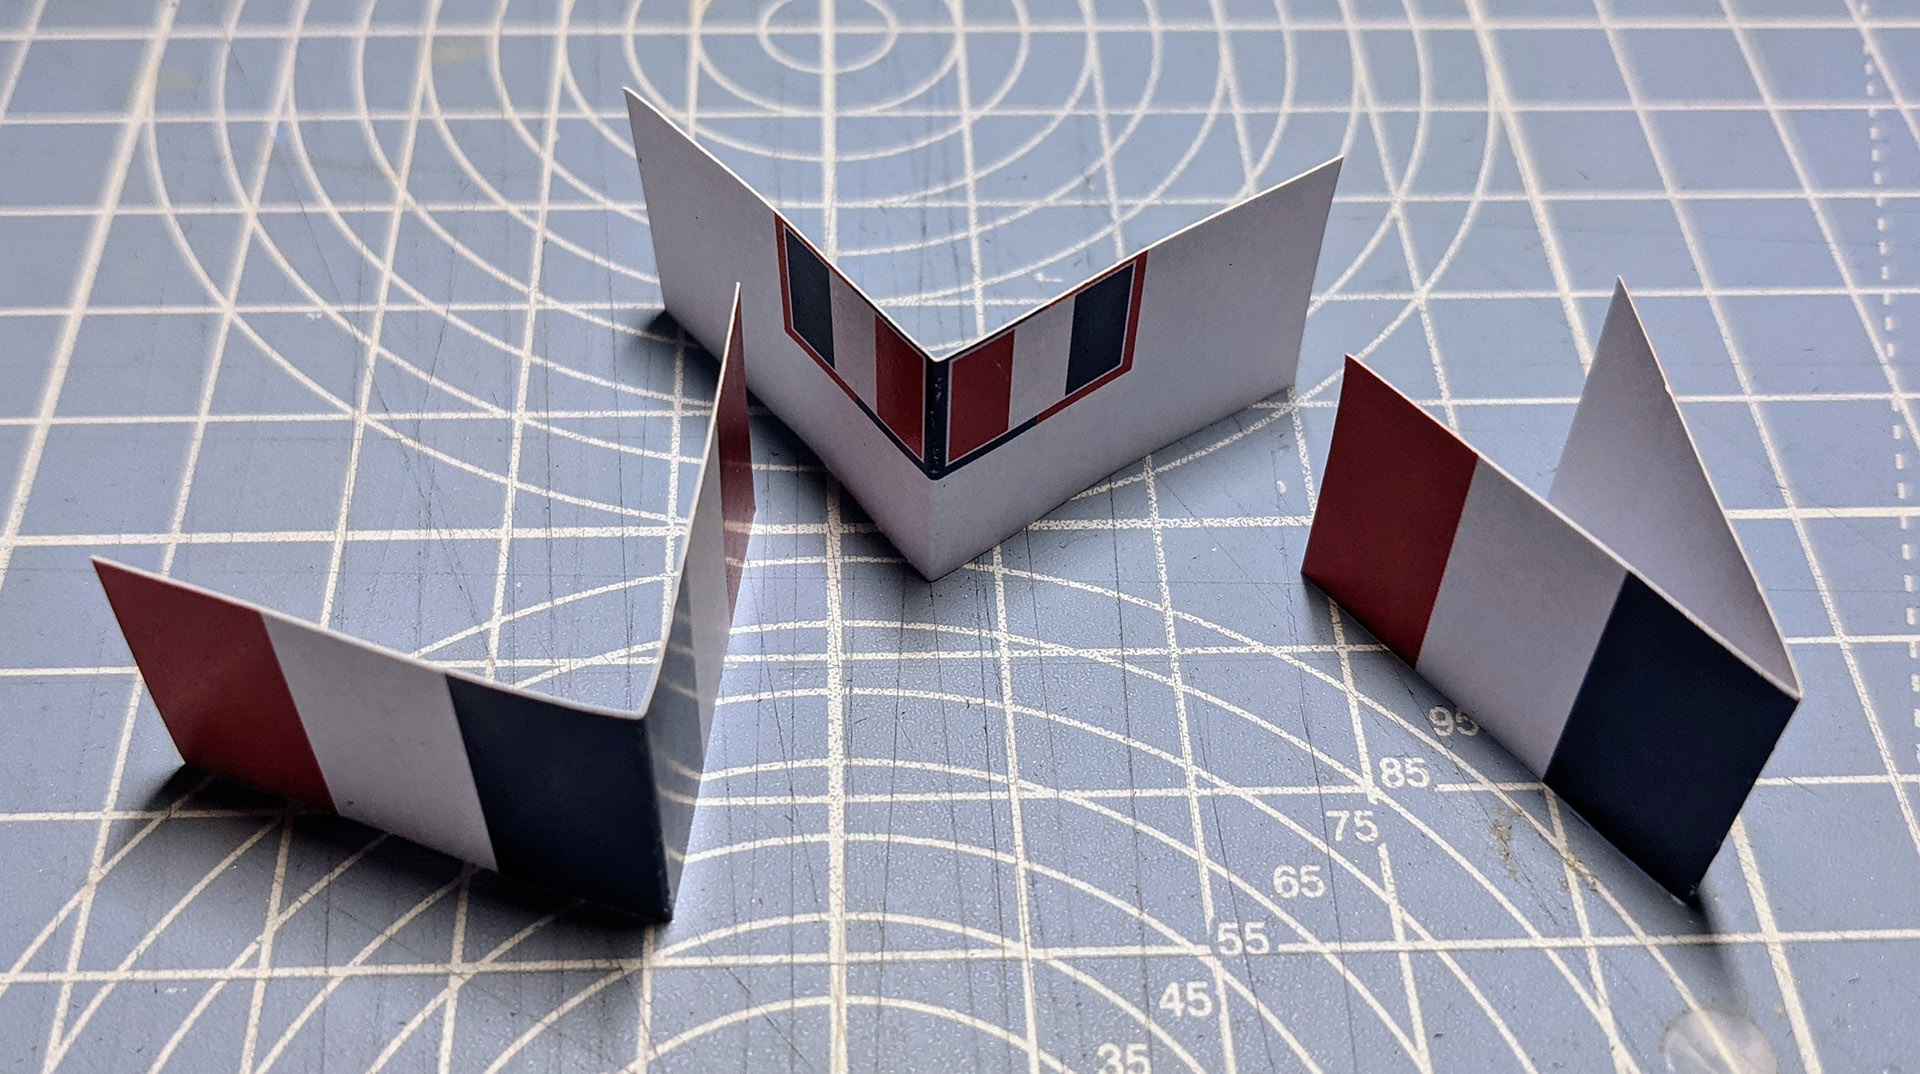
Trim
Give the flags a couple of hours to dry up, then use small scissors or a craft knife to trim up the edges of the flag where they don't exactly line up. Obviously you can't cut the paperclips in this stage, we'll fix any mistakes there later.

This is a very bad example of the flag not lining up perfectly. To fix this trip the flag until the edges match.

The same flag after trimming. This is now ready for painting.
Paint the edges
This is probably the most important stage and really takes your flags to the next level. You want to paint the white edges of the paper to match the design of the flag.
The colour match doesn't have to be perfect, the blue I use for my British and French flags could be closer, but you're painting such a small area on a small flag it isn't super important.
Gloss varnish
This can be a bit messy on the smaller flags. I find the best approach is to paint one side, let it dry for an hour, then paint the other side. I don't worry too much about the edges, but they seem to get covered in the process. The tricky bit is avoiding getting varnish on the other side of the smaller flags, that will stick to the table and damage the print. Don't use a rattle can, the pressure will blow your flags all over the place!
Curl
Once the vanish is dry on both sides you want to curl the flags so they look like flags! I use my fingers, but you could curl them around a pen or brush.
Because you're batching the flags they will end up looking all the same, but don't worry about this too much, when they are on ships they will look unique.
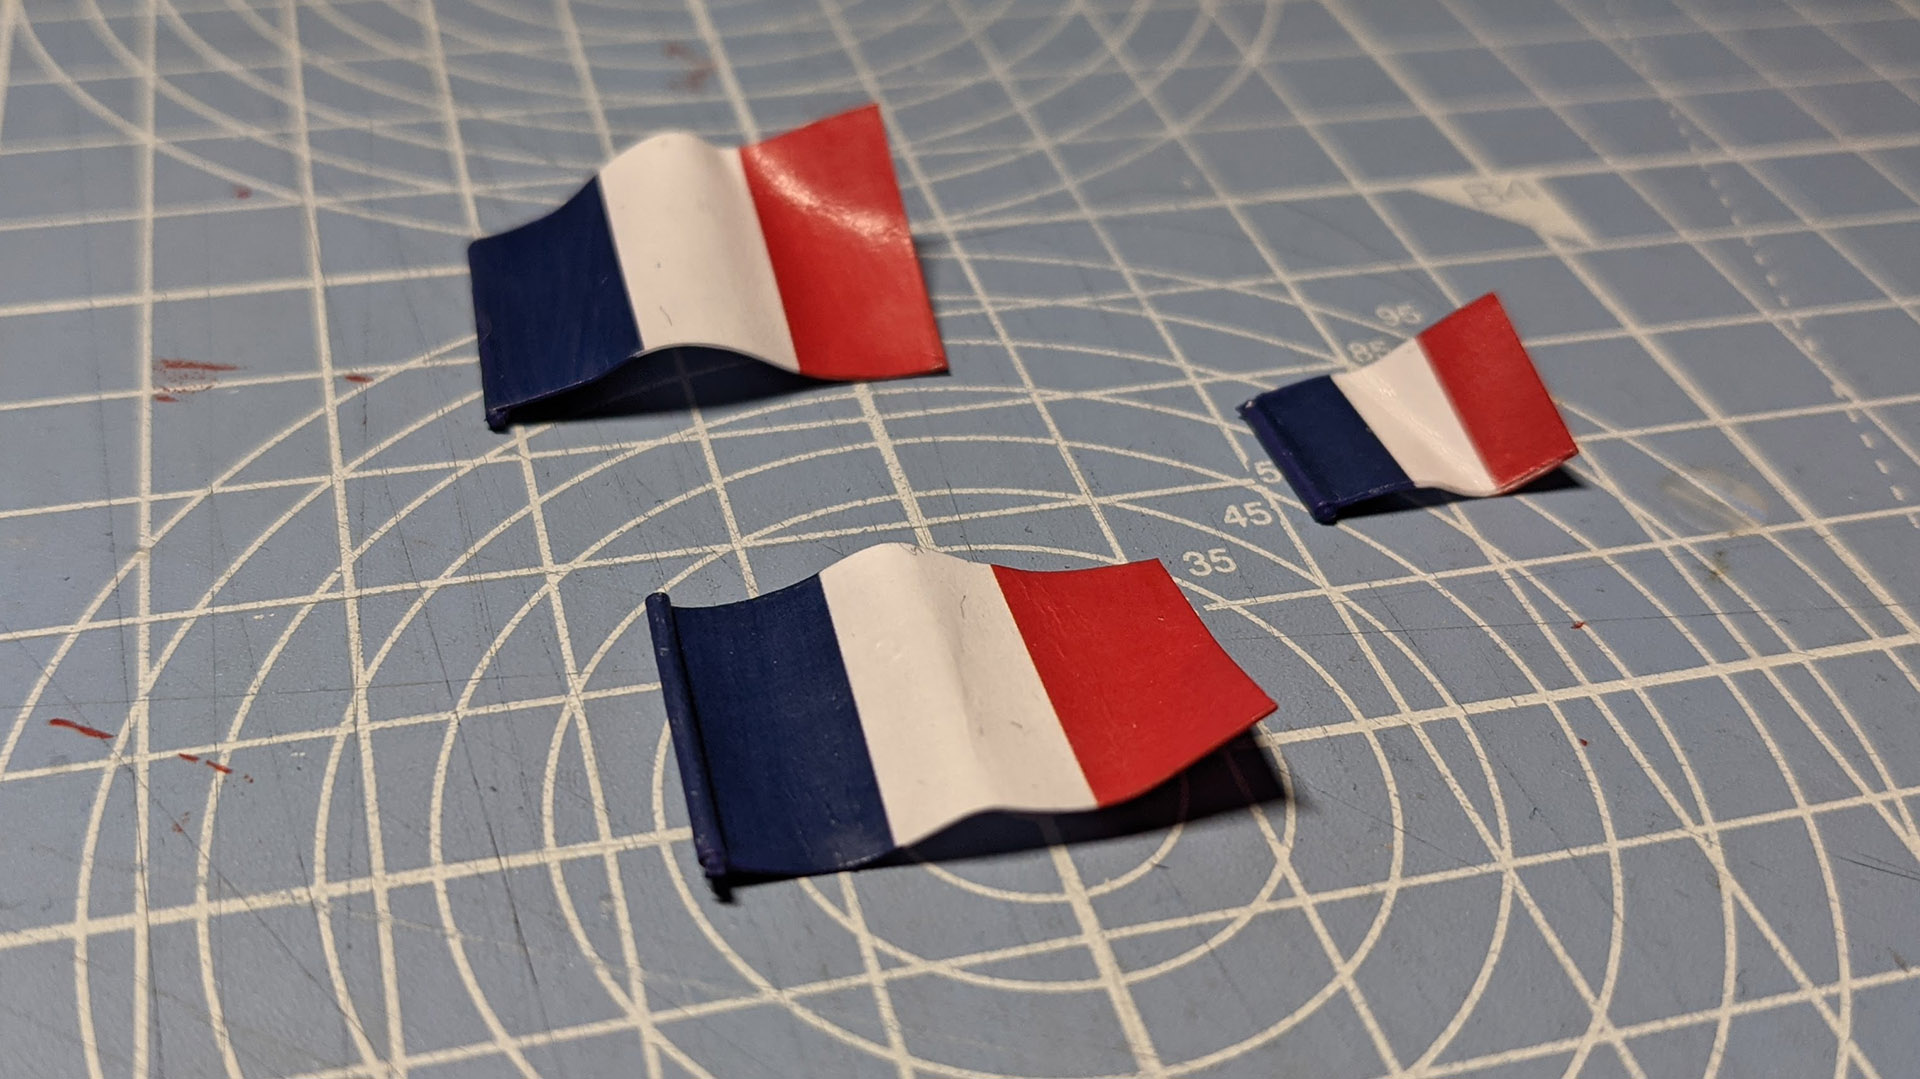
Flags after being curled. This picture also shows off the painted edges, which really help give your flags a professional look.
Mat varnish
Shiny flags don't look great so repeat the varnish step above with mat varnish. Doing this after the curl step will help set the shape and the extra layer of vanish makes the flags more durable.
Trim the poles
Use the wire cutters to trim the top and bottom of the paperclip so that it's as flush as possible to the paper flag.
Paint the flag poles
Your flag poles will now be shiny metal. To improve the look paint the edges of the paperclips, either the colour of the flag at that point, or black.
You can optionally complete the above two steps before applying the mat vanish to protect the flag pole paint. However you then need to apply the varnish without the paperclip handle which can be a pain. I use the order shown here and haven't had any trouble with the paint rubbing off.
Gallery
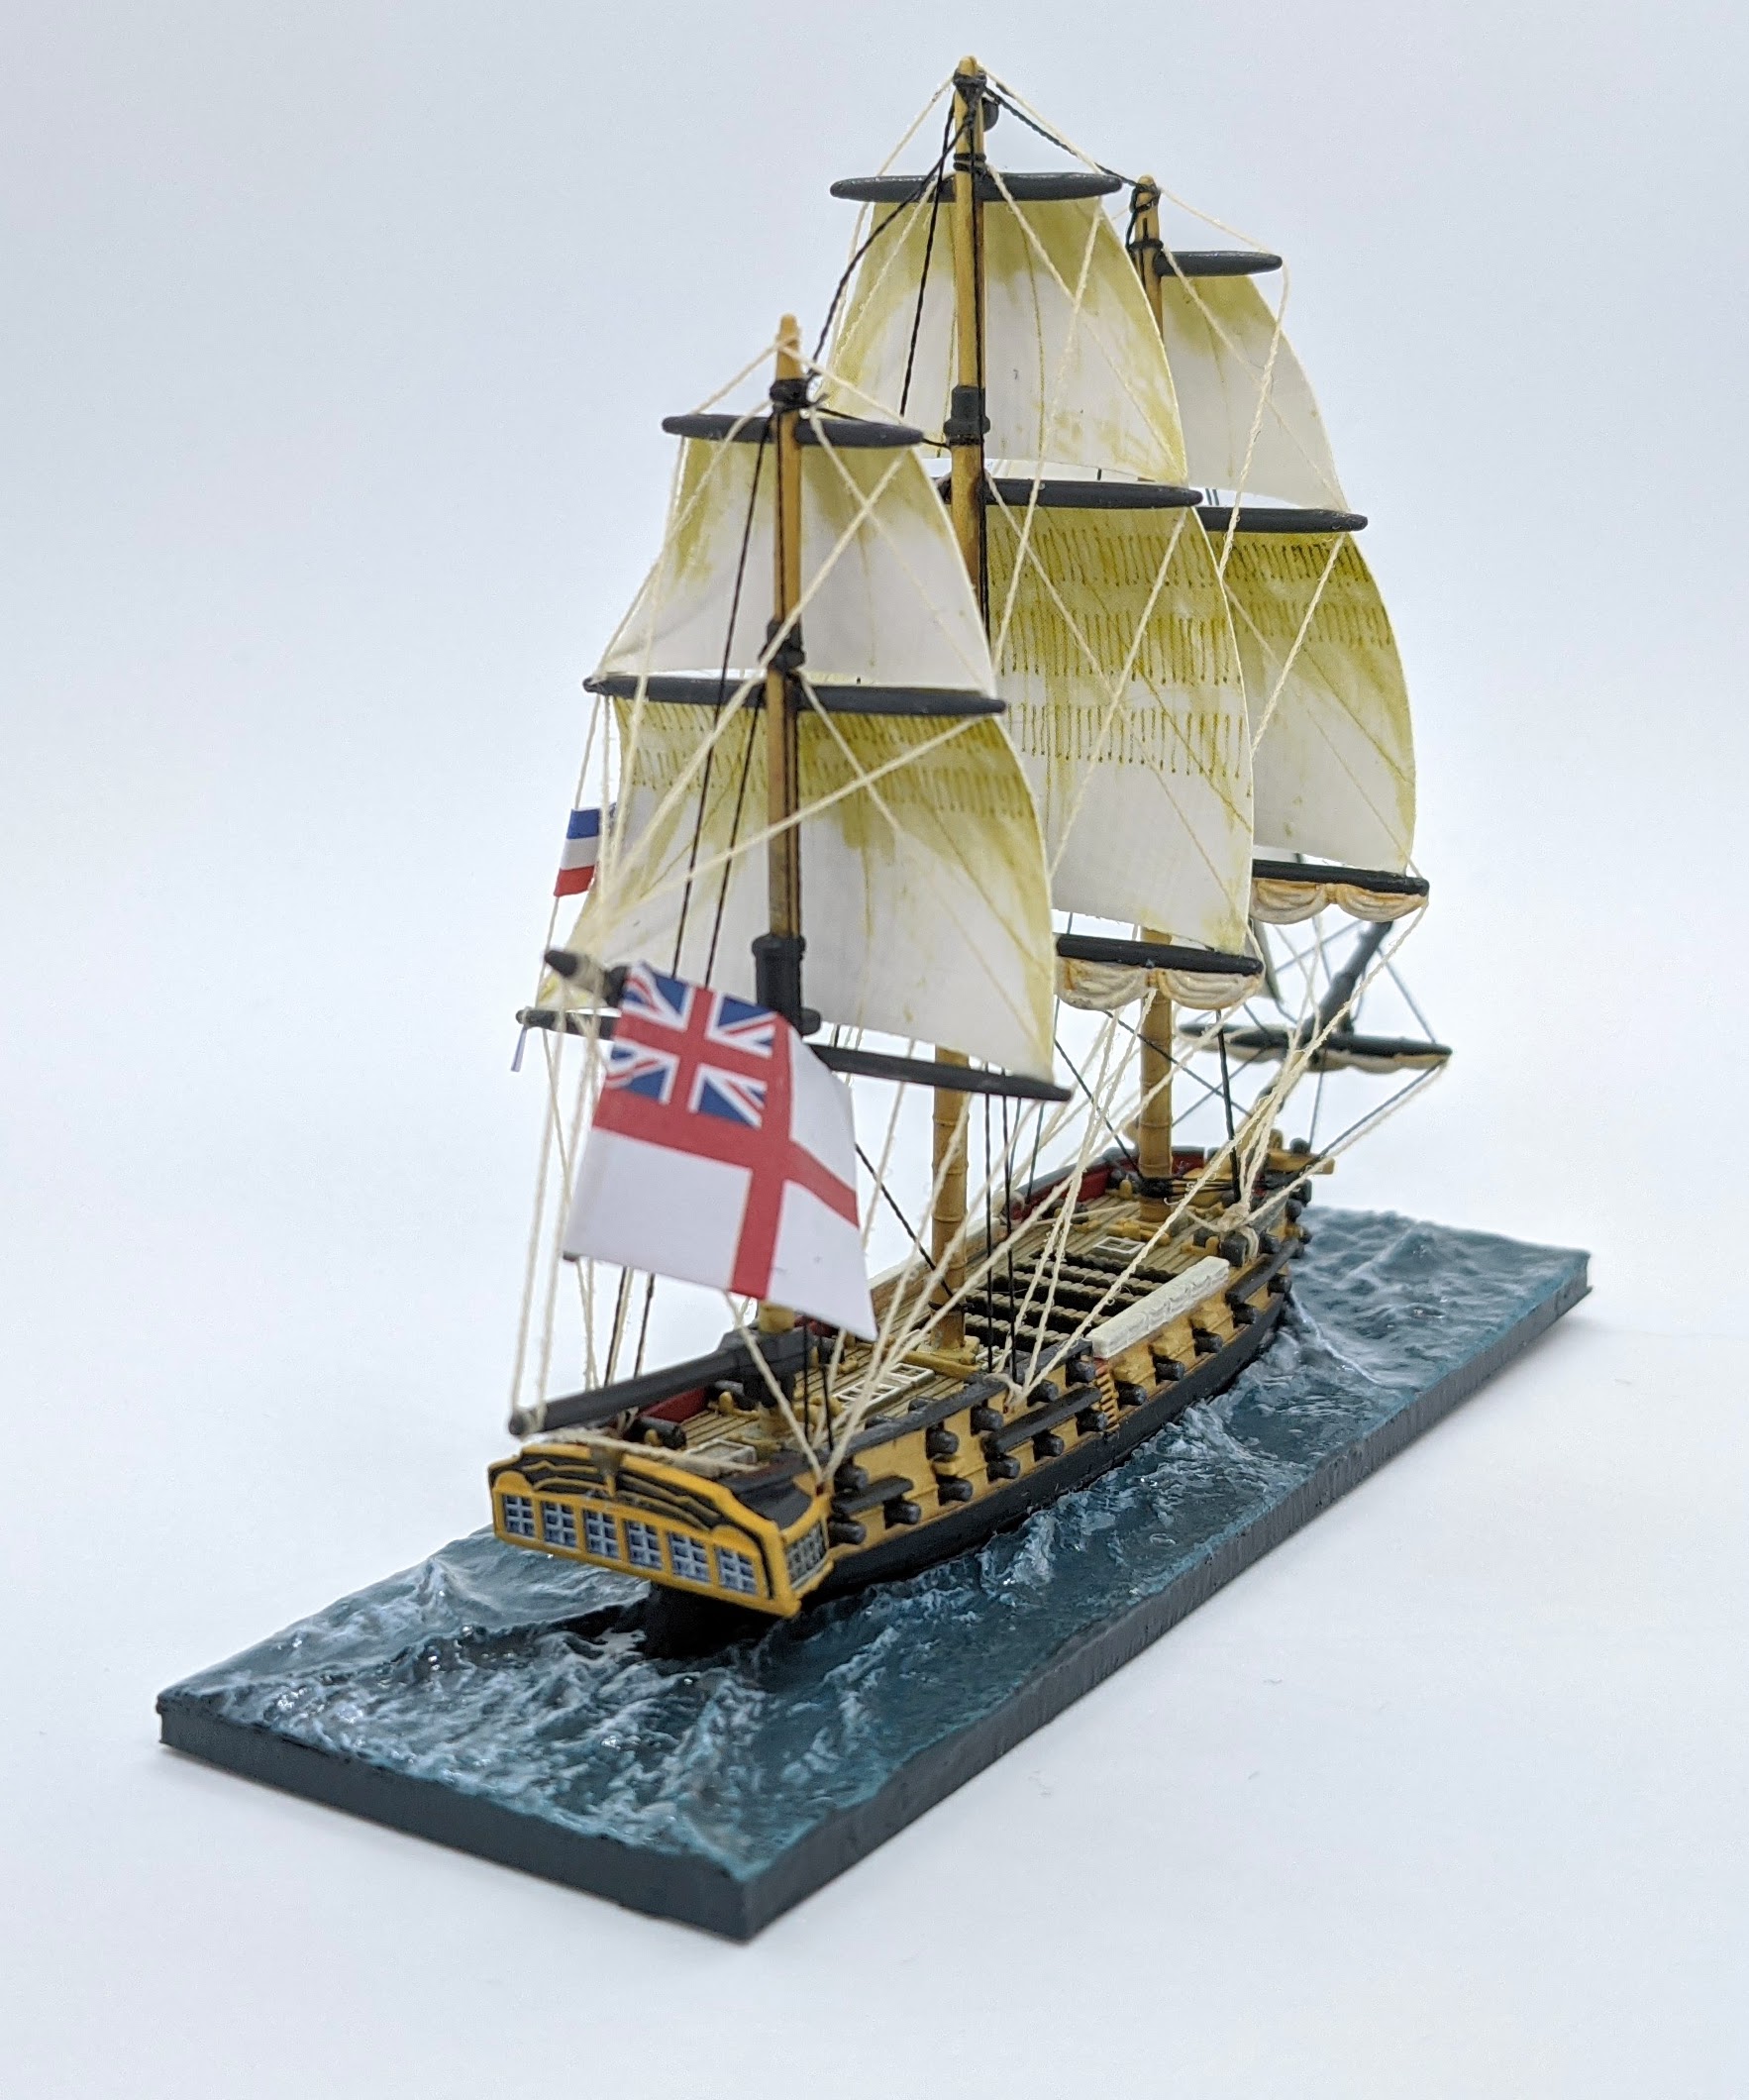
Post 1800 Act of Union Frigate sailing in the White squadron. The flag is attached to a magnet at the top. Part of the paperclip can be seen at the bottom of the flag.
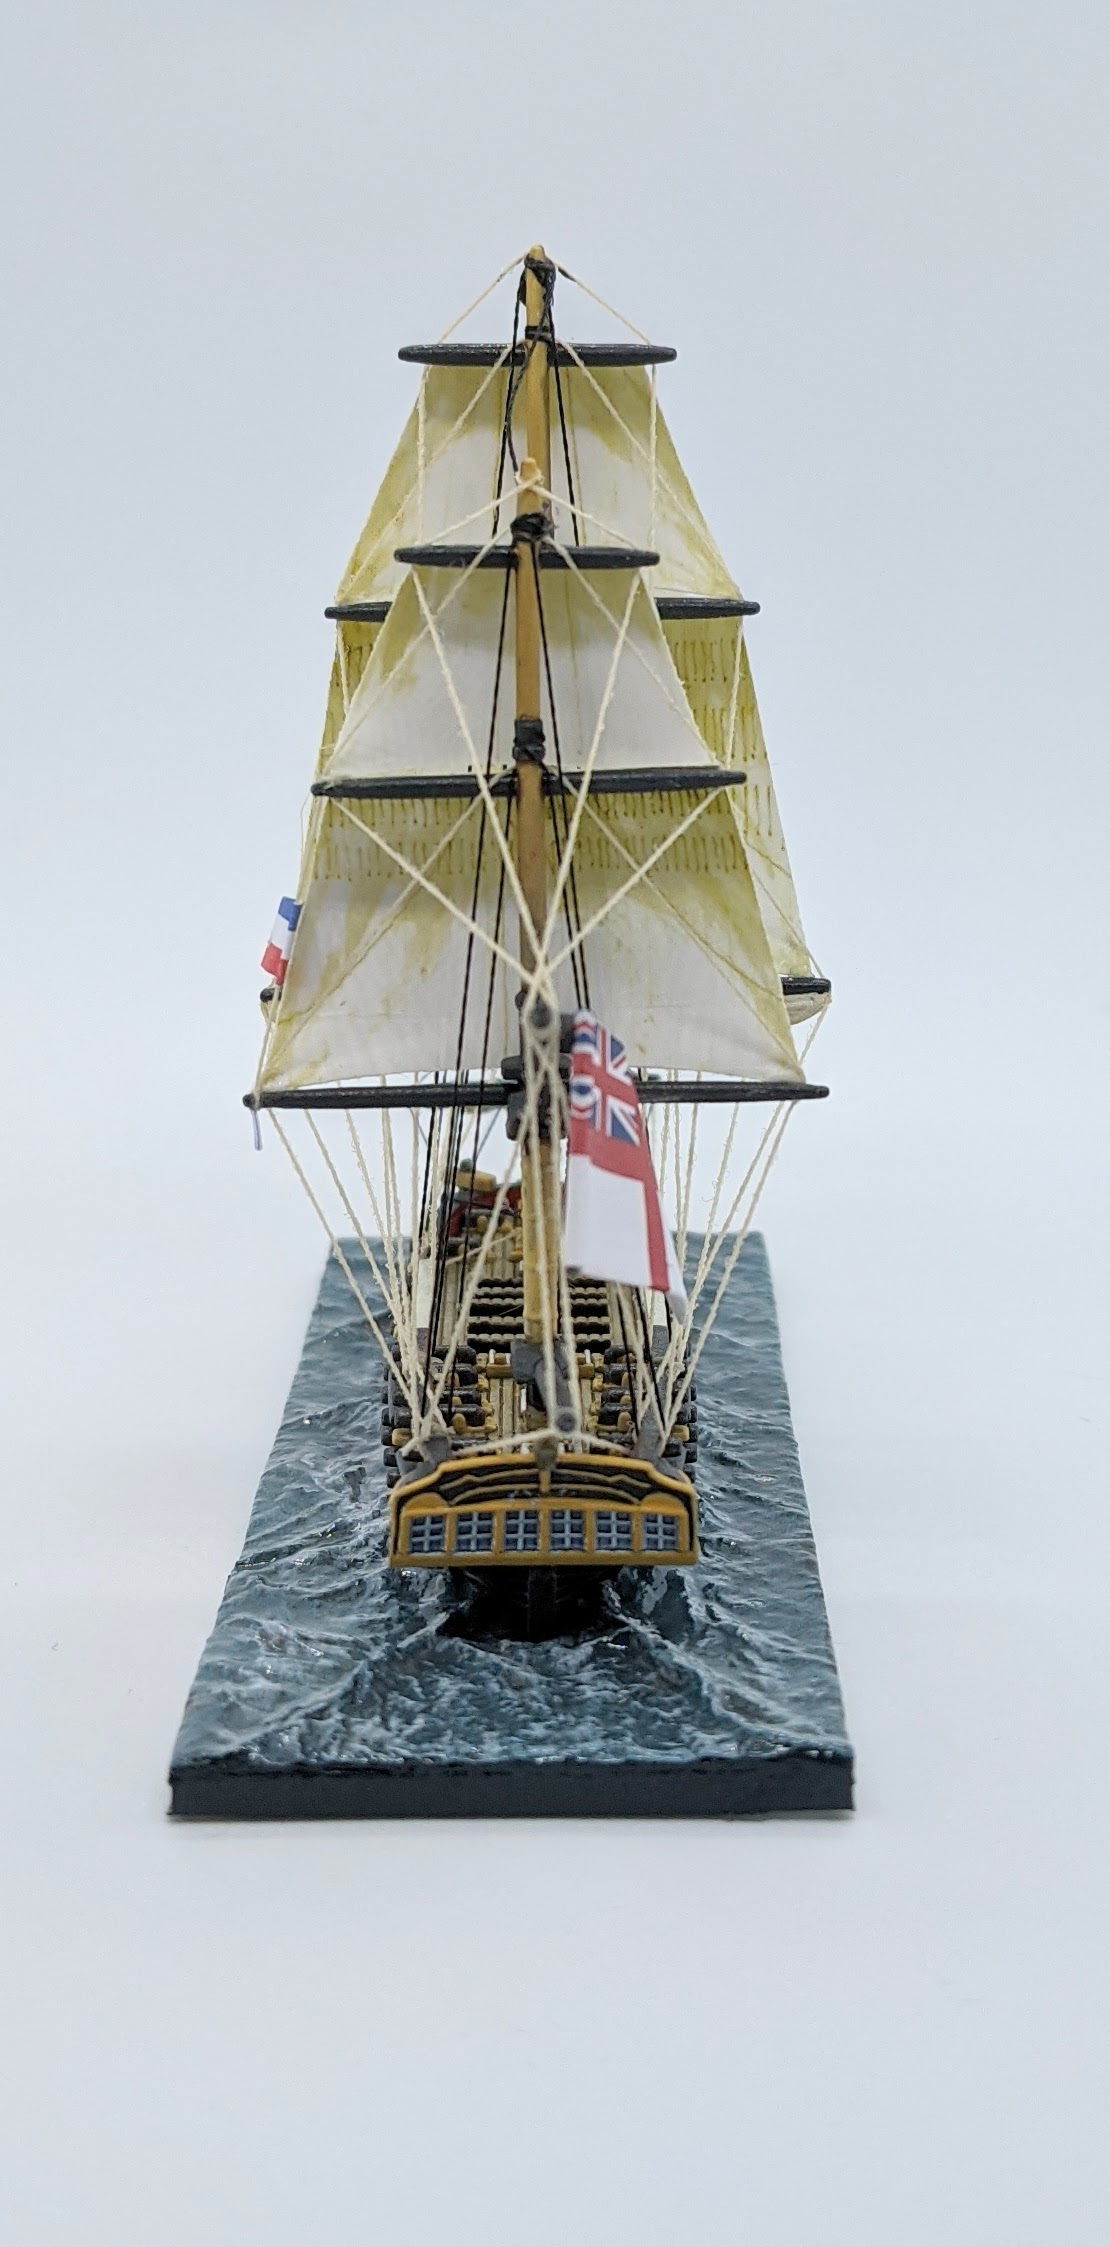
Rear view of the same ship showing how the flag is curled to make it look like it's flapping in the wind. This picture highlights the importance of painting the edges of the flag to hide what would be the white of the paper. Although taking some time, it is an easy way to take the flag to the next level.

Napoleonic French Flag on a frigate model. The smaller signal flag (used to match the model with the ship card) is permanently attached to the model.
great idea!…..what size magnets did you use?
3mmx1mm disk magnets are just about strong enough to hold the flag in place while looking good on the model.
Interesting idea. Do you have a close up of where you put the magnet? I notice your thin penants are squared off at the end where Warlord’s go to a point. Are the Warlord flags wrong?
My flags are not as pointy as they should be. I’ve made them to withstand handling at the table so tried to avoid thin tips that might be broken.